

elasticsearch和kibana使用x-pack实现权限控制
目录:
安装es
wget https://artifacts.elastic.co/downloads/elasticsearch/elasticsearch-7.3.1-linux-x86_64.tar.gz
yum install -y java-11-openjdk
修改限制
/etc/security/limits.conf
* soft nofile 655360
* hard nofile 655360
* soft memlock unlimited
* hard memlock unlimited
/etc/sysctl.conf
vm.max_map_count=262144
es配置
config/elasticsearch.yml
cluster.name: dohko-es
node.name: dohko-es-0001
node.master: true
node.data: true
node.ingest: true
path.data: /data/elasticsearch/data
path.logs: /data/elasticsearch/logs
bootstrap.memory_lock: true
http.cors.allow-origin: "*"
http.cors.allow-methods: OPTIONS, HEAD, GET, POST, PUT, DELETE
http.cors.allow-headers: X-Requested-With, X-Auth-Token, Content-Type, Content-Length, Authorization
network.host: 0.0.0.0
http.cors.enabled: true
http.port: 9200
discovery.seed_hosts: ["172.20.65.1", "172.20.65.2", "172.20.65.3"]
cluster.initial_master_nodes: ["dohko-es-0001"]
#gateway.recover_after_nodes: 3
#action.destructive_requires_name: true
jvm配置
config/jvm.options
-Xms28g
-Xmx28g
-XX:+UseG1GC
-XX:InitiatingHeapOccupancyPercent=75
-XX:MaxGCPauseMillis=100
-Des.networkaddress.cache.ttl=60
-Des.networkaddress.cache.negative.ttl=10
-XX:+AlwaysPreTouch
-Xss1m
-Djava.awt.headless=true
-Dfile.encoding=UTF-8
-Djna.nosys=true
-XX:-OmitStackTraceInFastThrow
-Dio.netty.noUnsafe=true
-Dio.netty.noKeySetOptimization=true
-Dio.netty.recycler.maxCapacityPerThread=0
-Dlog4j.shutdownHookEnabled=false
-Dlog4j2.disable.jmx=true
-Djava.io.tmpdir=${ES_TMPDIR}
-XX:+HeapDumpOnOutOfMemoryError
-XX:HeapDumpPath=data
-XX:ErrorFile=logs/hs_err_pid%p.log

8:-XX:+PrintGCDetails
8:-XX:+PrintGCDateStamps
8:-XX:+PrintTenuringDistribution
8:-XX:+PrintGCApplicationStoppedTime
8:-Xloggc:logs/gc.log
8:-XX:+UseGCLogFileRotation
8:-XX:NumberOfGCLogFiles=32
8:-XX:GCLogFileSize=64m

9-:-Xlog:gc*,gc+age=trace,safepoint:file=logs/gc.log:utctime,pid,tags:filecount=32,filesize=64m
9-:-Djava.locale.providers=COMPAT
使用es安全相关
创建ca证书
https://www.elastic.co/guide/en/elasticsearch/reference/7.0/configuring-security.html
$ ./bin/elasticsearch-certutil ca
ZWUzOWJjZTE1NmE1
$ ./bin/elasticsearch-certutil cert --ca elastic-stack-ca.p12
MDNkNzIxNTg2NDBh # 这步可以不输入密码可以跳过下一步
$ mkdir /data/elasticsearch/config/certs
$ mv elastic-* /data/elasticsearch/config/certs
$ chown -R es.es /data/elasticsearch/config/certs
拷贝到其他机器
设置密码
如果生成的时候不设置可以跳过
$ sudo -u es bin/elasticsearch-keystore add xpack.security.transport.ssl.keystore.secure_password
MDNkNzIxNTg2NDBh
$ sudo -u es bin/elasticsearch-keystore add xpack.security.transport.ssl.truststore.secure_password
MDNkNzIxNTg2NDBh
配置es
xpack.security.transport.ssl.verification_mode: certificate
xpack.security.transport.ssl.keystore.path: certs/elastic-certificates.p12
xpack.security.transport.ssl.truststore.path: certs/elastic-certificates.p12
启动服务
$ sudo -u es ./bin/elasticsearch -d
验证
$ curl "http://127.0.0.1:9200/_license"
{"error":{"root_cause":[{"type":"security_exception","reason":"missing authentication credentials for REST request [/_license]","header":{"WWW-Authenticate":"Basic realm=\"security\" charset=\"UTF-8\""}}],"type":"security_exception","reason":"missing authentication cred
entials for REST request [/_license]","header":{"WWW-Authenticate":"Basic realm=\"security\" charset=\"UTF-8\""}},"status":401}
设置初始密码
sudo -u es bin/elasticsearch-setup-passwords interactive
Initiating the setup of passwords for reserved users elastic,apm_system,kibana,logstash_system,beats_system,remote_monitoring_user.
You will be prompted to enter passwords as the process progresses.
Please confirm that you would like to continue [y/N]y


Enter password for [elastic]: ZDY0NGZjNzU2ZDI4
Reenter password for [elastic]:
Enter password for [apm_system]: MmQ4ZGNjOGJjZjBk
Reenter password for [apm_system]:
Enter password for [kibana]: ZDVjOTQxY2I0MWU1
Reenter password for [kibana]:
Enter password for [logstash_system]: YTU3NzNhMTIxMjcx
Reenter password for [logstash_system]:
Enter password for [beats_system]: OWQ5NjJmY2U4YTI0
Reenter password for [beats_system]:
Enter password for [remote_monitoring_user]: YTJiMjdhMjc0YjNl
Reenter password for [remote_monitoring_user]:
Changed password for user [apm_system]
Changed password for user [kibana]
Changed password for user [logstash_system]
Changed password for user [beats_system]
Changed password for user [remote_monitoring_user]
Changed password for user [elastic]
再次验证
$ curl -u elastic:ZDY0NGZjNzU2ZDI4 "http://127.0.0.1:9200/_license"
{
  "license" : {
    "status" : "active",
    "uid" : "eef8c5e8-a1b1-4c49-9984-e1b93d0318c9",
    "type" : "basic",
    "issue_date" : "2019-08-26T07:40:18.133Z",
    "issue_date_in_millis" : 1566805218133,
    "max_nodes" : 1000,
    "issued_to" : "dohko-es",
    "issuer" : "elasticsearch",
    "start_date_in_millis" : -1
  }
}
权限管理相关文档参考
kibana那边有界面化的解决方案
对于java使用9300端口
https://www.elastic.co/guide/en/elastic-stack-overview/7.x/java-clients.html 和 https://www.elastic.co/guide/en/elasticsearch/reference/7.x/setup-xpack-client.html
kibana
安装kibana
$ wget https://artifacts.elastic.co/downloads/kibana/kibana-7.3.1-linux-x86_64.tar.gz
$ tar xf kibana-7.3.1-linux-x86_64.tar.gz -C /data
$ mv kibana-7.3.1-linux-x86_64/ kibana
$ chown -R es.es kibana/
配置
erver.port: 5601
server.host: "0.0.0.0"
#server.basePath: ""
#server.rewriteBasePath: false
server.maxPayloadBytes: 1048576
#server.name: "your-hostname"
elasticsearch.hosts: ["http://172.20.65.1:9200"]
#elasticsearch.preserveHost: true
#kibana.index: ".kibana"
#kibana.defaultAppId: "home"
elasticsearch.username: "kibana"
elasticsearch.password: "ZDVjOTQxY2I0MWU1"

server.ssl.enabled: false
#server.ssl.certificate: /data/elasticsearch/config/certs/elastic-certificates.p12
#server.ssl.key: /data/elasticsearch/config/certs/elastic-stack-ca.p12

elasticsearch.ssl.certificate: /data/elasticsearch/config/certs/elastic-certificates.p12
elasticsearch.ssl.key: /data/elasticsearch/config/certs/elastic-certificates.p12

elasticsearch.ssl.certificateAuthorities: [ "/data/elasticsearch/config/certs/elastic-stack-ca.p12" ]
#elasticsearch.ssl.verificationMode: full

elasticsearch.pingTimeout: 1500
elasticsearch.requestTimeout: 60000
#elasticsearch.requestHeadersWhitelist: [ authorization ]
#elasticsearch.customHeaders: {}
#elasticsearch.shardTimeout: 30000
#elasticsearch.startupTimeout: 5000
#elasticsearch.logQueries: false
pid.file: /data/kibana/kibana.pid
logging.dest: /data/kibana/logs/kibana.log
#logging.silent: false
#logging.quiet: false
#logging.verbose: false
#ops.interval: 5000
i18n.locale: "zh-CN"
启动服务
$ sudo -u es ./bin/kibana serve
添加测试数据
# megacorp索引
$ curl -XPUT -u elastic:ZDY0NGZjNzU2ZDI4 'http://127.0.0.1:9200/megacorp/employee/1' -H 'Content-type: application/json;charset=utf-8' -d '{"first_name" : "John", "last_name" : "Smith", "age" : 25, "about" : "I love to go rock climbing", "interests": [ "sports", "music" ]}'
{"_index":"megacorp","_type":"employee","_id":"1","_version":1,"result":"created","_shards":{"total":2,"successful":1,"failed":0},"_seq_no":0,"_primary_term":1}
$ curl -XPUT -u elastic:ZDY0NGZjNzU2ZDI4 'http://127.0.0.1:9200/megacorp/employee/2' -H 'Content-type: application/json;charset=utf-8' -d '{"first_name" : "Jane", "last_name" : "Smith", "age" : 32, "about" : "I like to collect rock albums", "interests": [ "music" ]}'
$ curl -XPUT -u elastic:ZDY0NGZjNzU2ZDI4 'http://127.0.0.1:9200/megacorp/employee/3' -H 'Content-type: application/json;charset=utf-8' -d '{"first_name" : "Douglas", "last_name" : "Fir", "age" : 35, "about" : "I like to build cabinets", "interests": [ "forestry" ]}'

# other索引
$ curl -XPUT -u elastic:ZDY0NGZjNzU2ZDI4 'http://127.0.0.1:9200/other/employee/1' -H 'Content-type: application/json;charset=utf-8' -d '{"first_name" : "John", "last_name" : "Smith", "age" : 25, "about" : "I love to go rock climbing", "interests": [ "sports", "music" ]}'
$ curl -XPUT -u elastic:ZDY0NGZjNzU2ZDI4 'http://127.0.0.1:9200/other/employee/2' -H 'Content-type: application/json;charset=utf-8' -d '{"first_name" : "Jane", "last_name" : "Smith", "age" : 32, "about" : "I like to collect rock albums", "interests": [ "music" ]}'
$ curl -XPUT -u elastic:ZDY0NGZjNzU2ZDI4 'http://127.0.0.1:9200/other/employee/3' -H 'Content-type: application/json;charset=utf-8' -d '{"first_name" : "Douglas", "last_name" : "Fir", "age" : 35, "about" : "I like to build cabinets", "interests": [ "forestry" ]}'
获取测试数据
$ curl -XGET -u elastic:ZDY0NGZjNzU2ZDI4 'http://127.0.0.1:9200/megacorp/employee/1'
$ curl -XGET -u elastic:ZDY0NGZjNzU2ZDI4 'http://127.0.0.1:9200/other/employee/1'
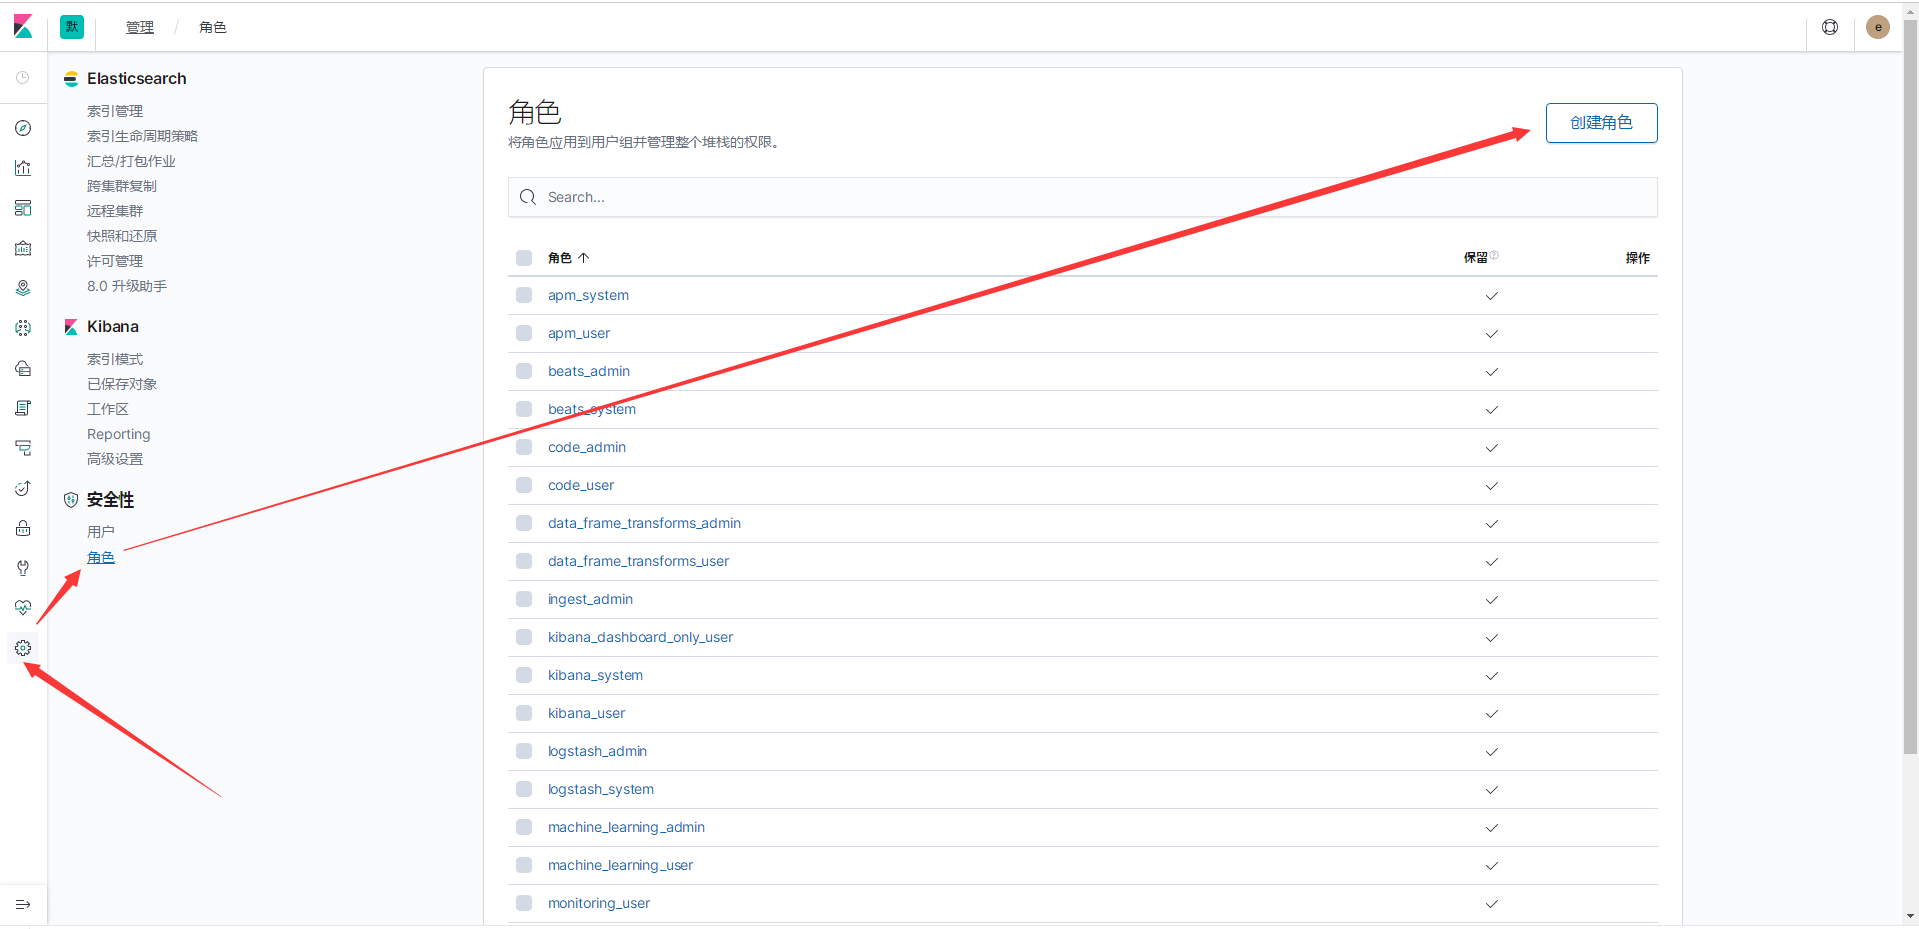
kibana添加es的角色和用户
根据测试的索引megacorp创建用户权限
浏览器打开172.20.65.1:5601
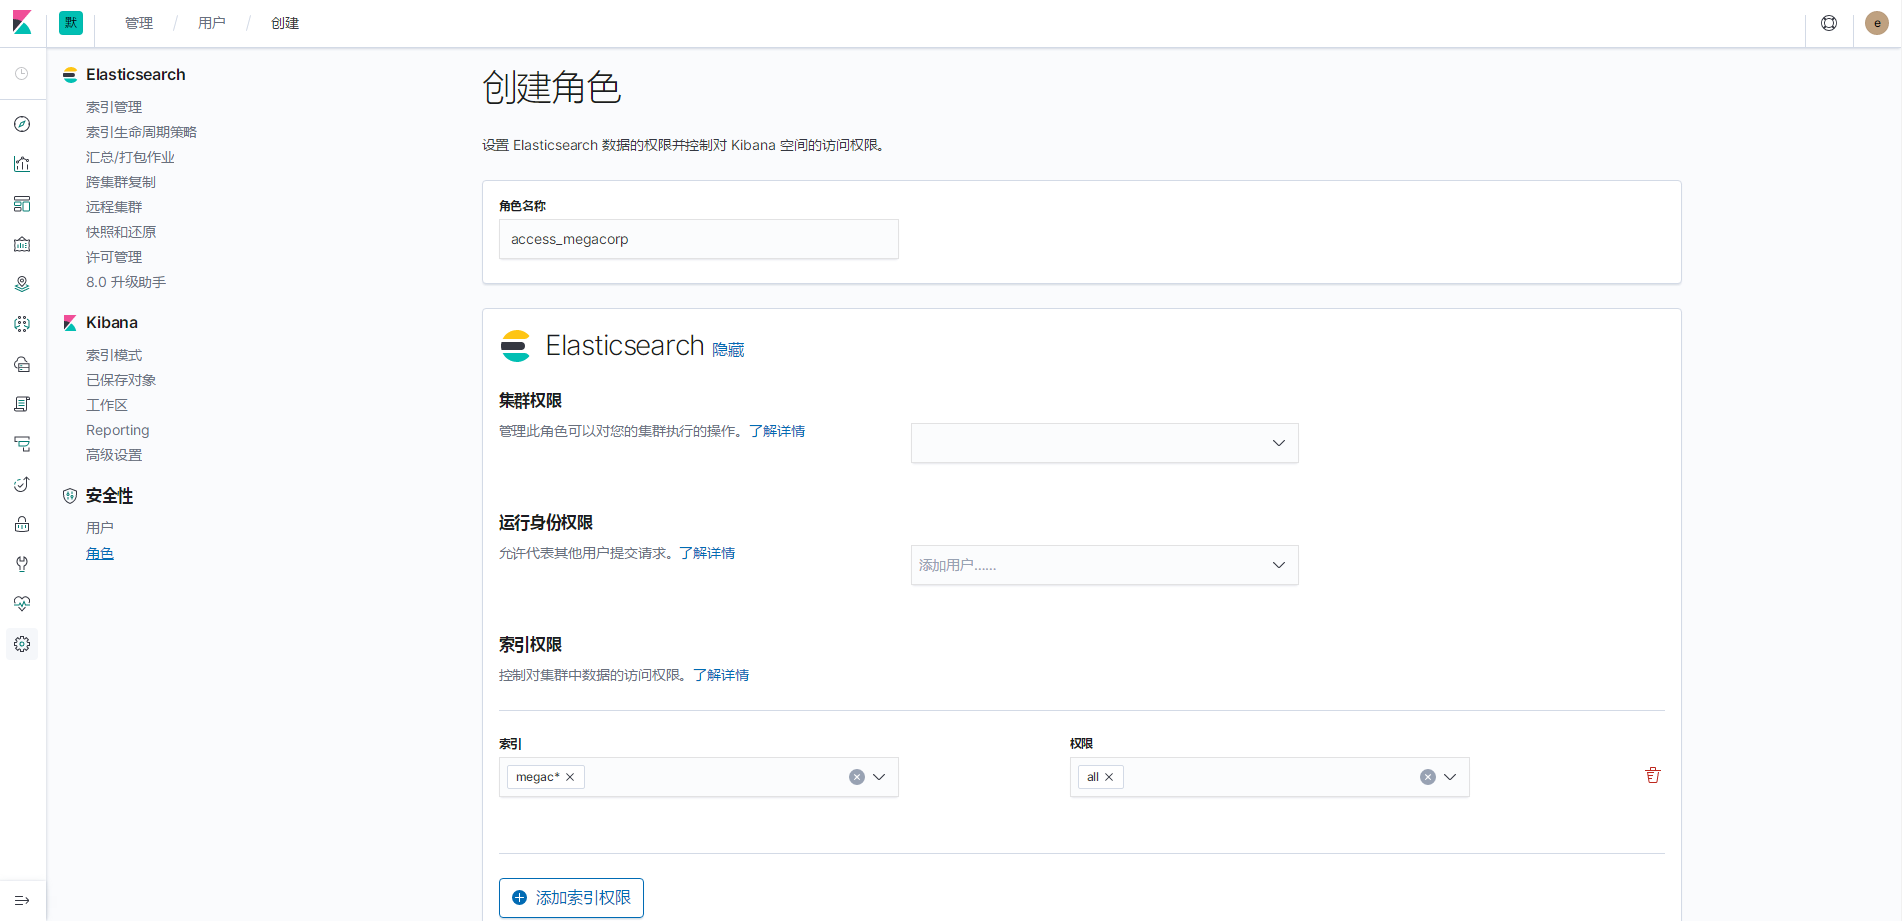
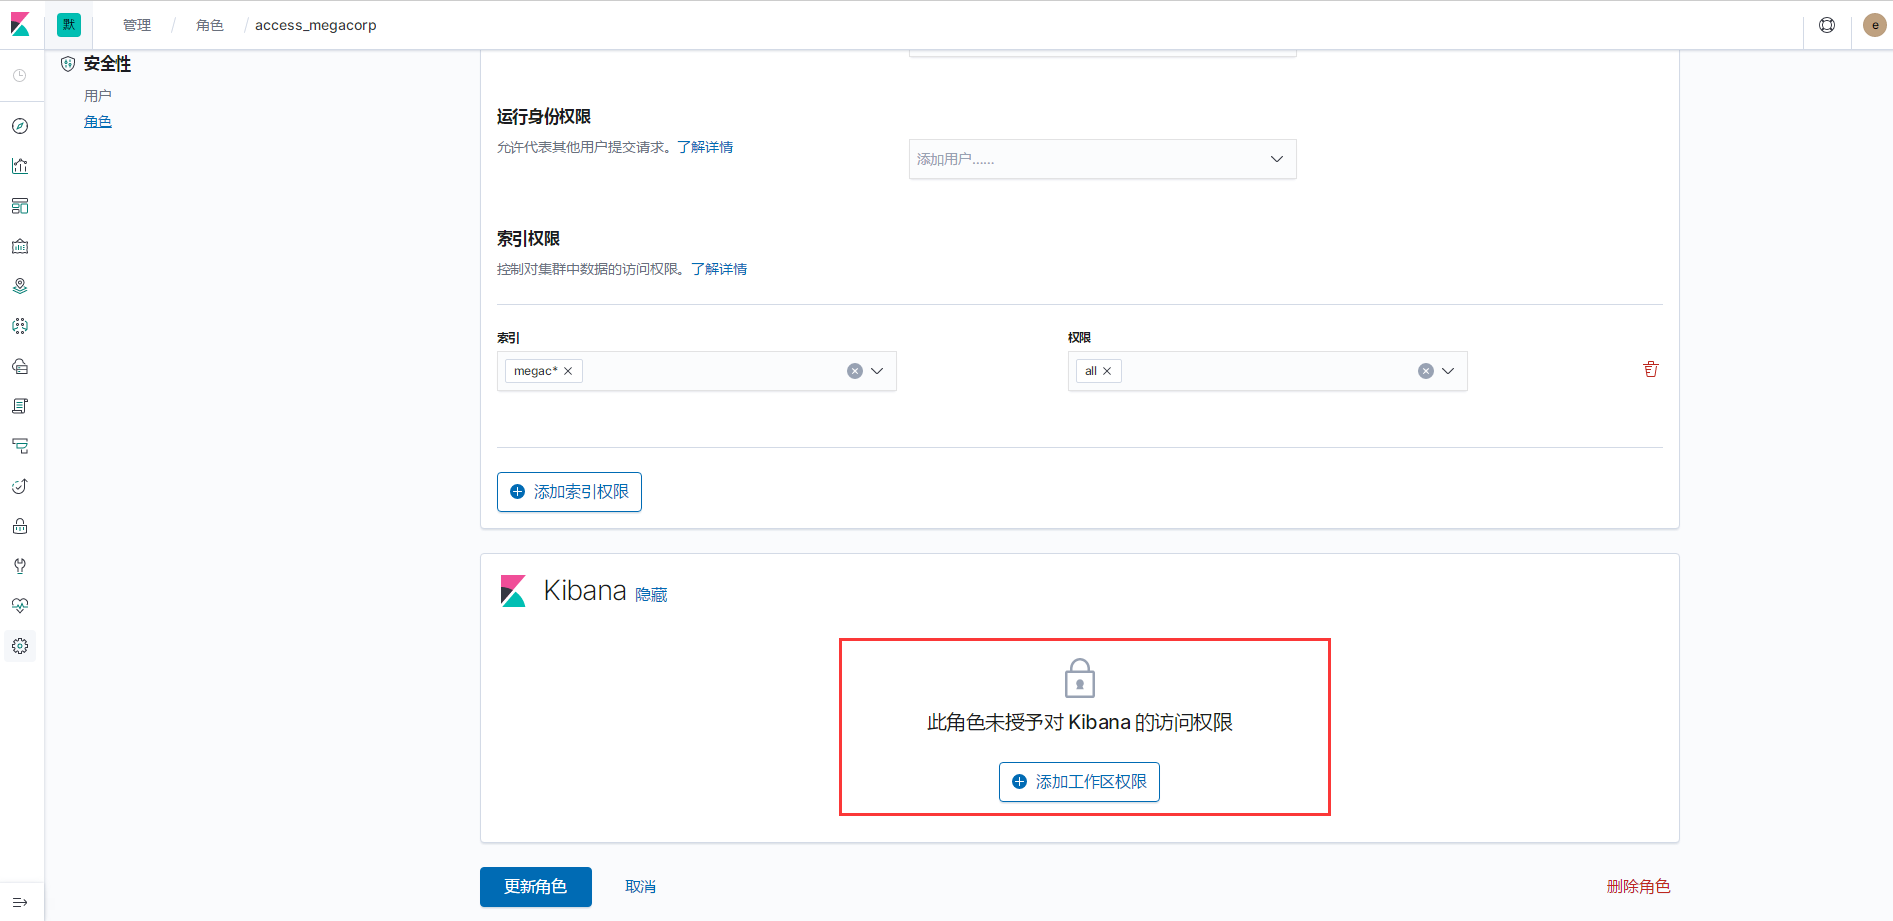
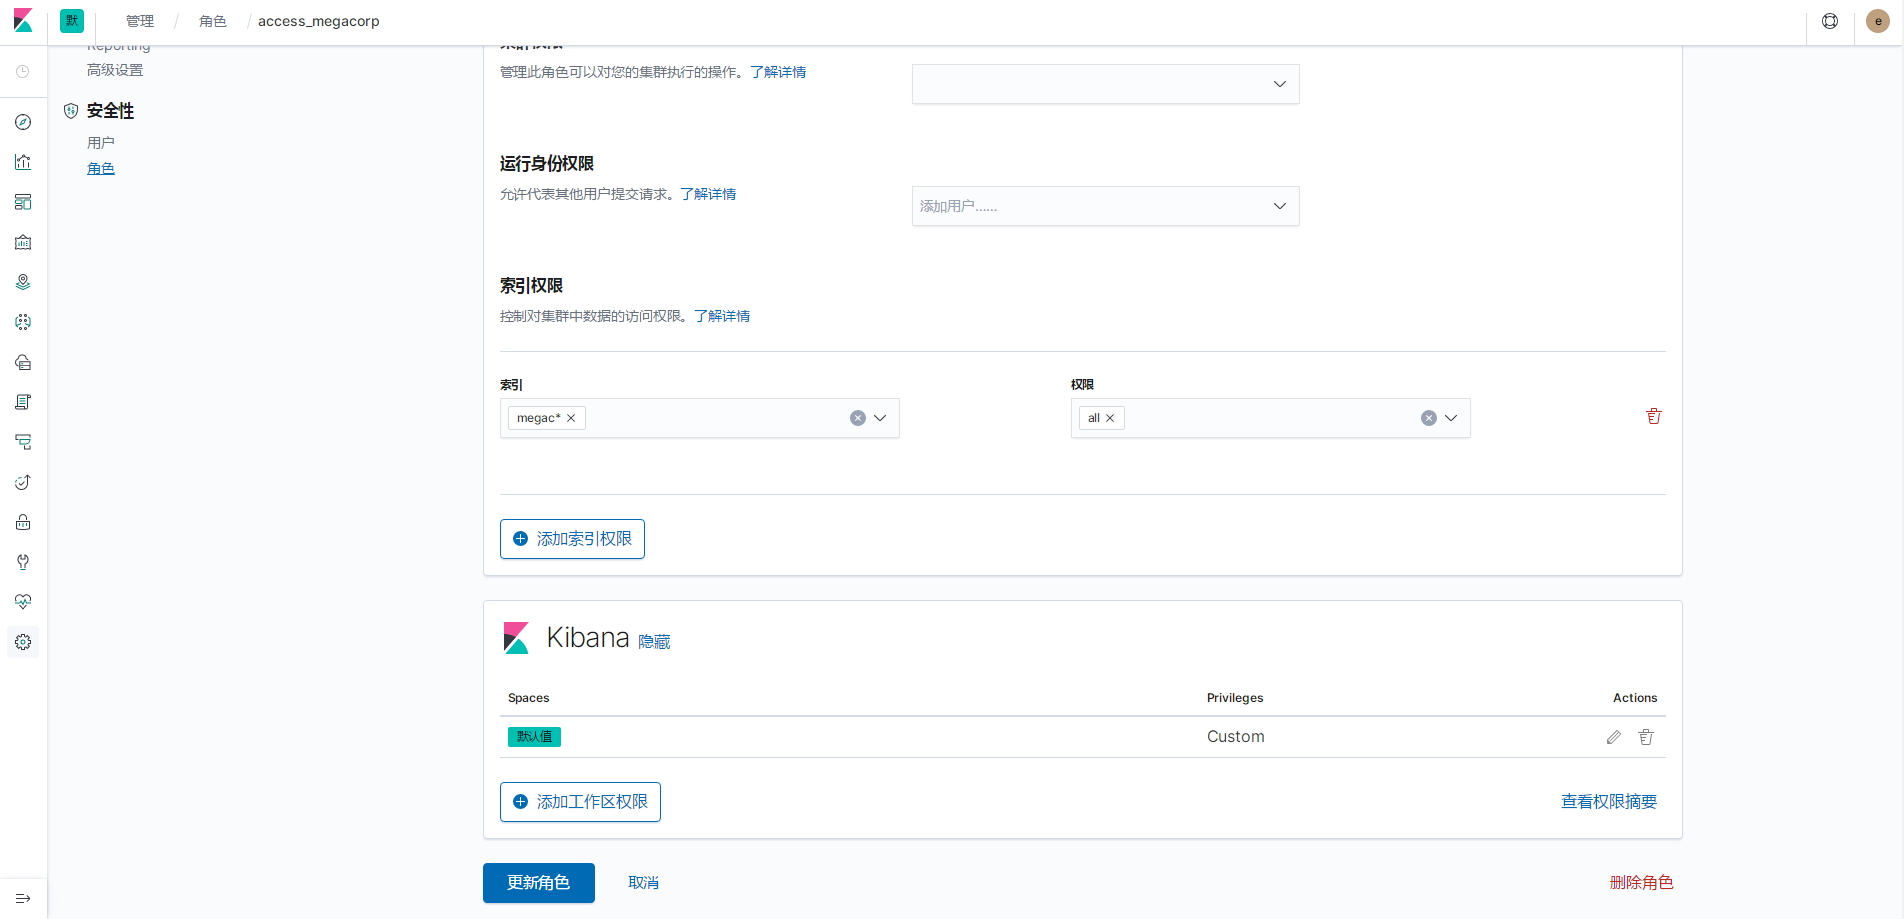
创建角色
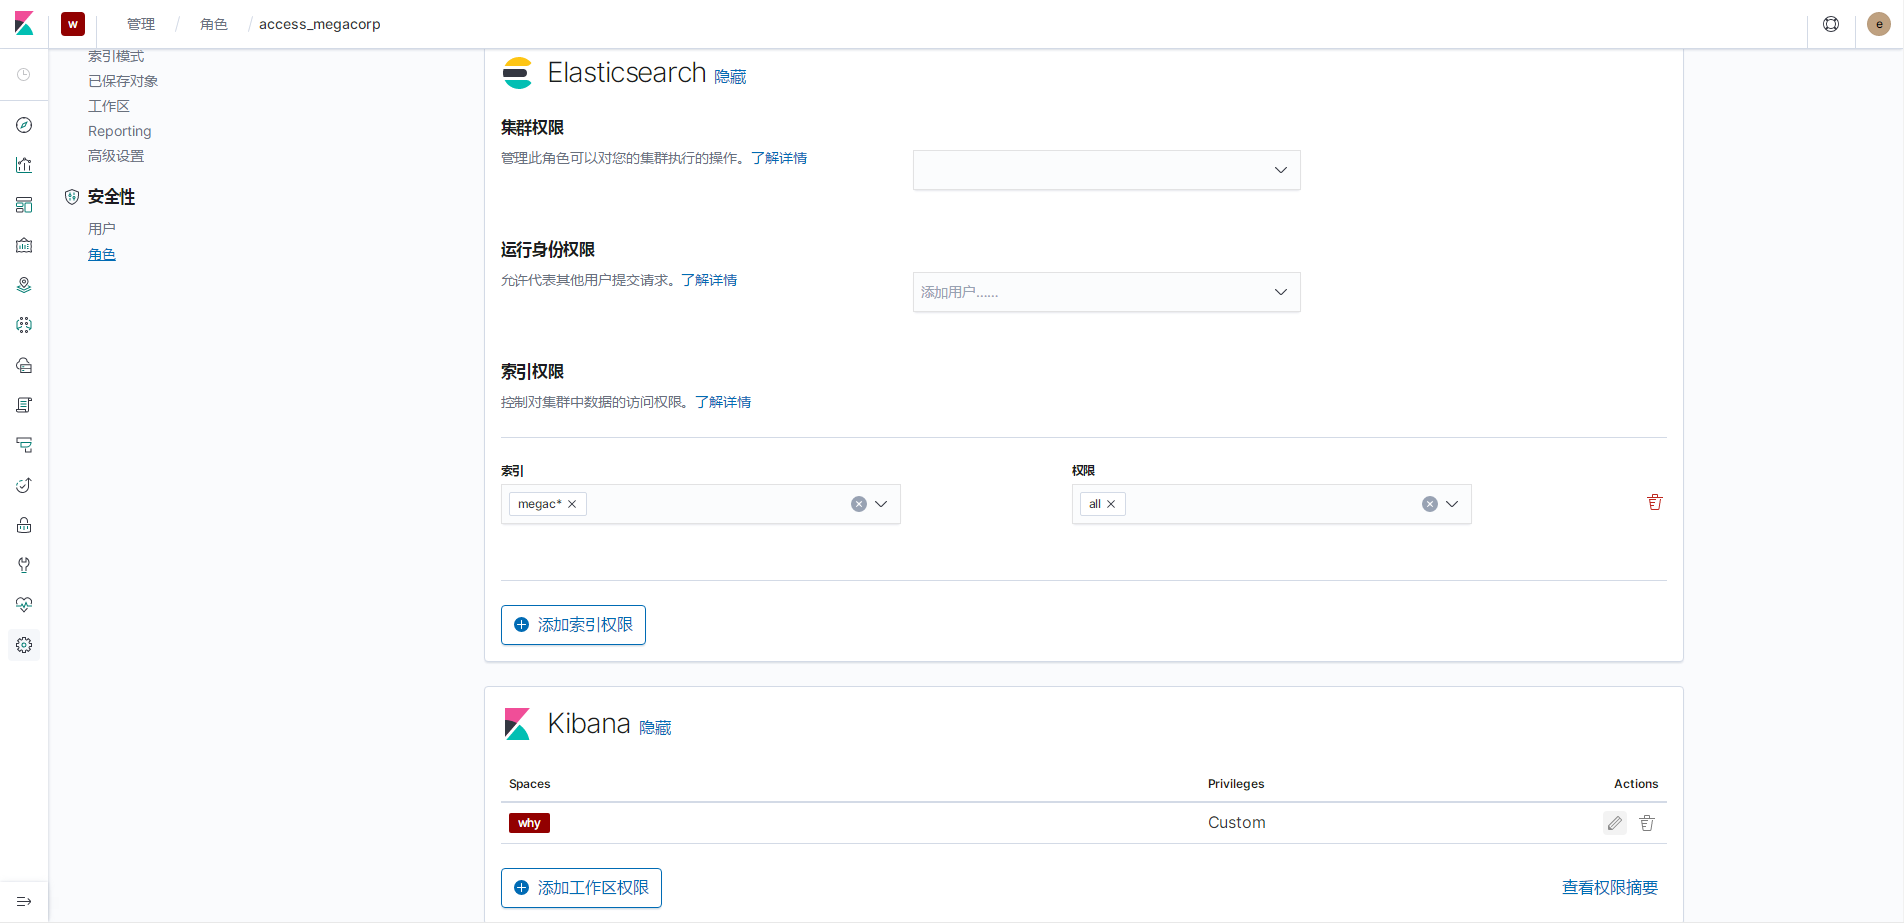
有megacorp索引权限的access_megacorp
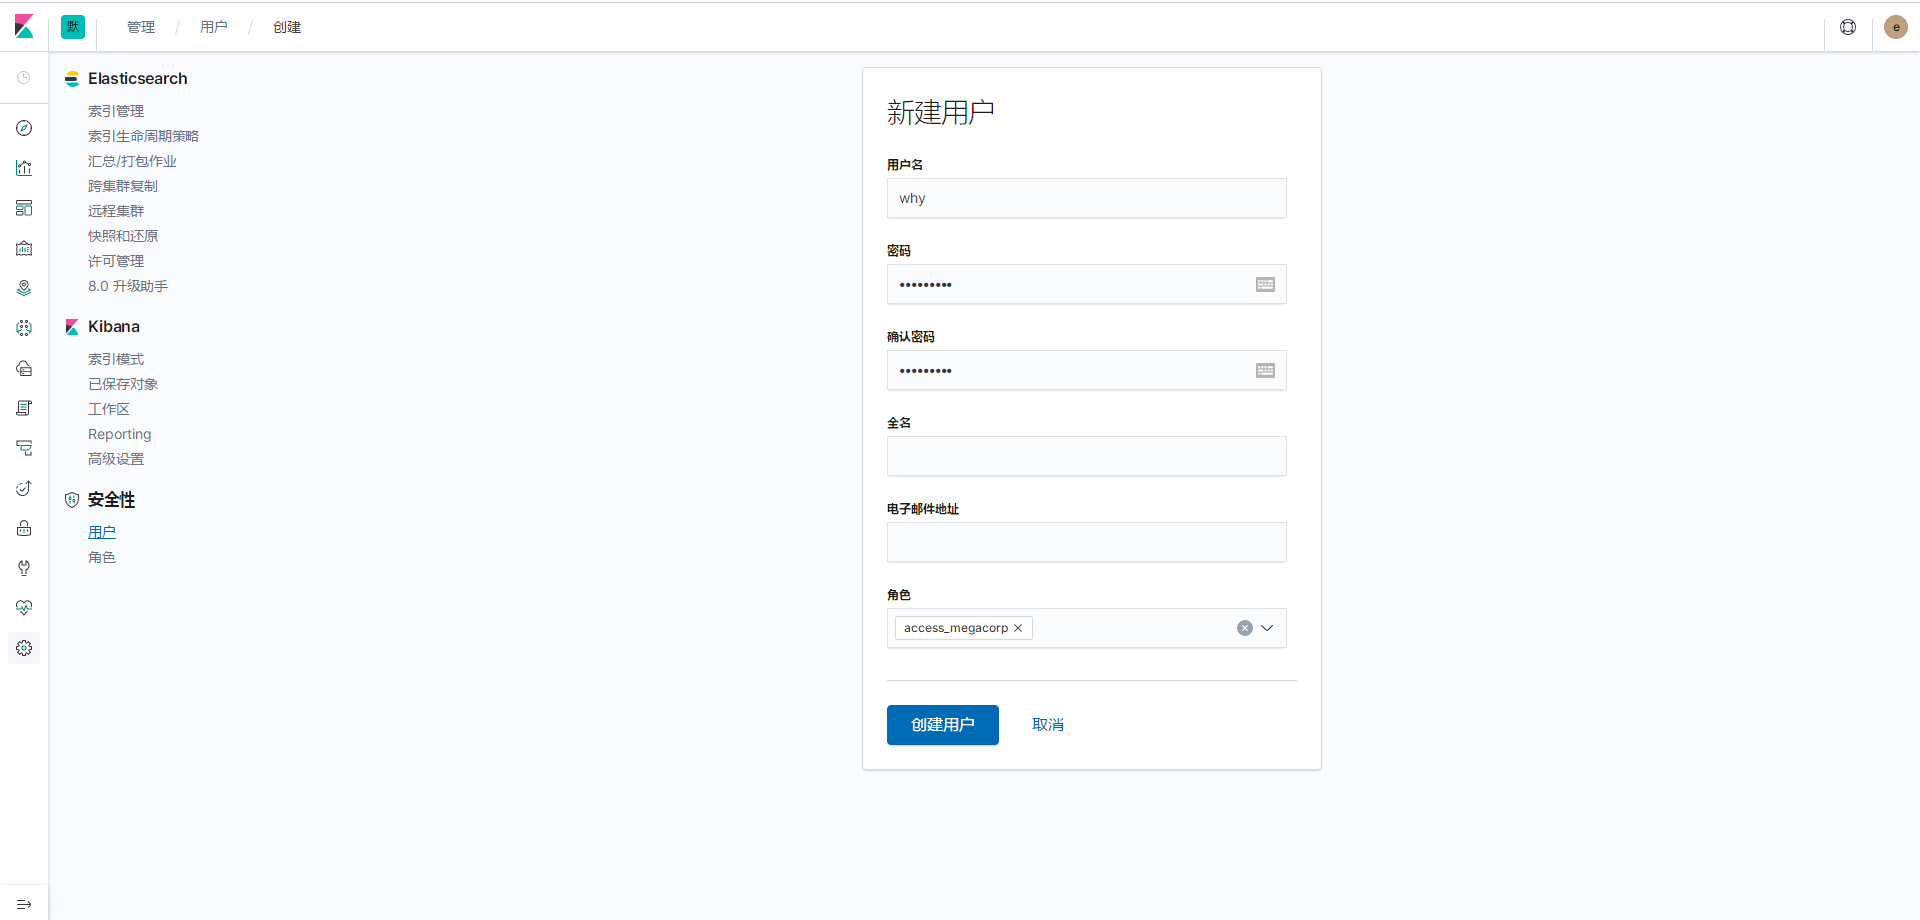
创建用户
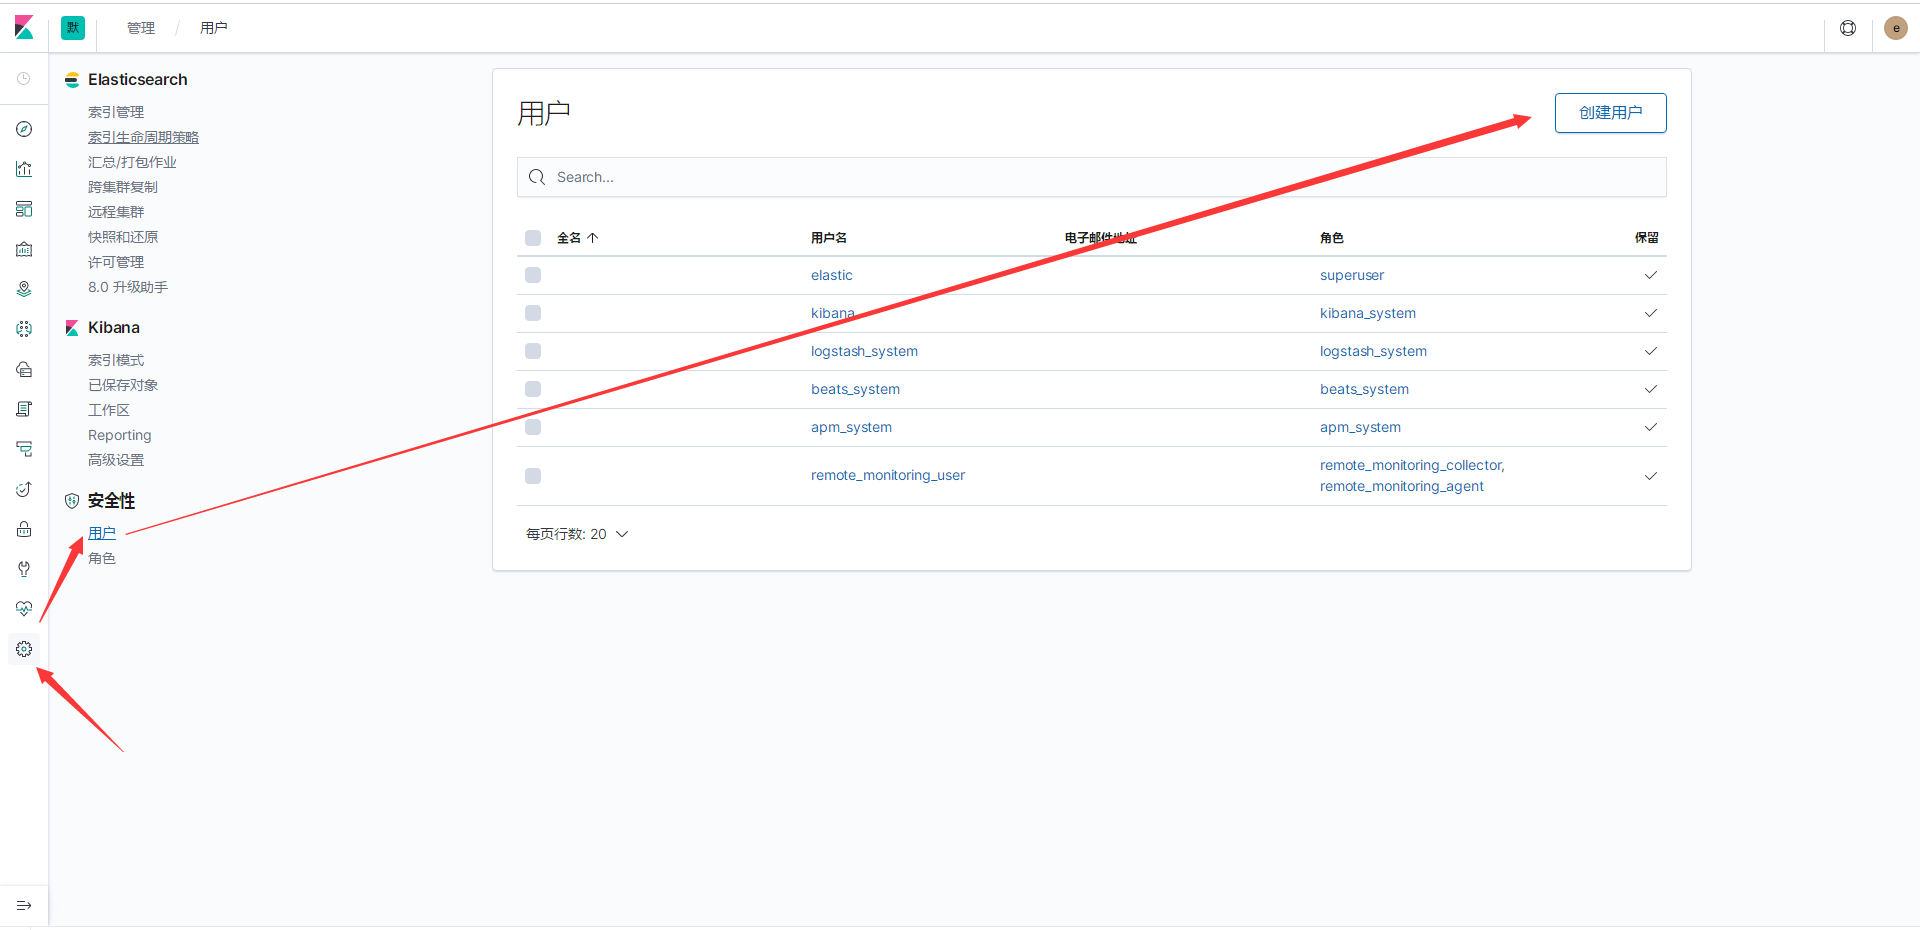
有access_why用户
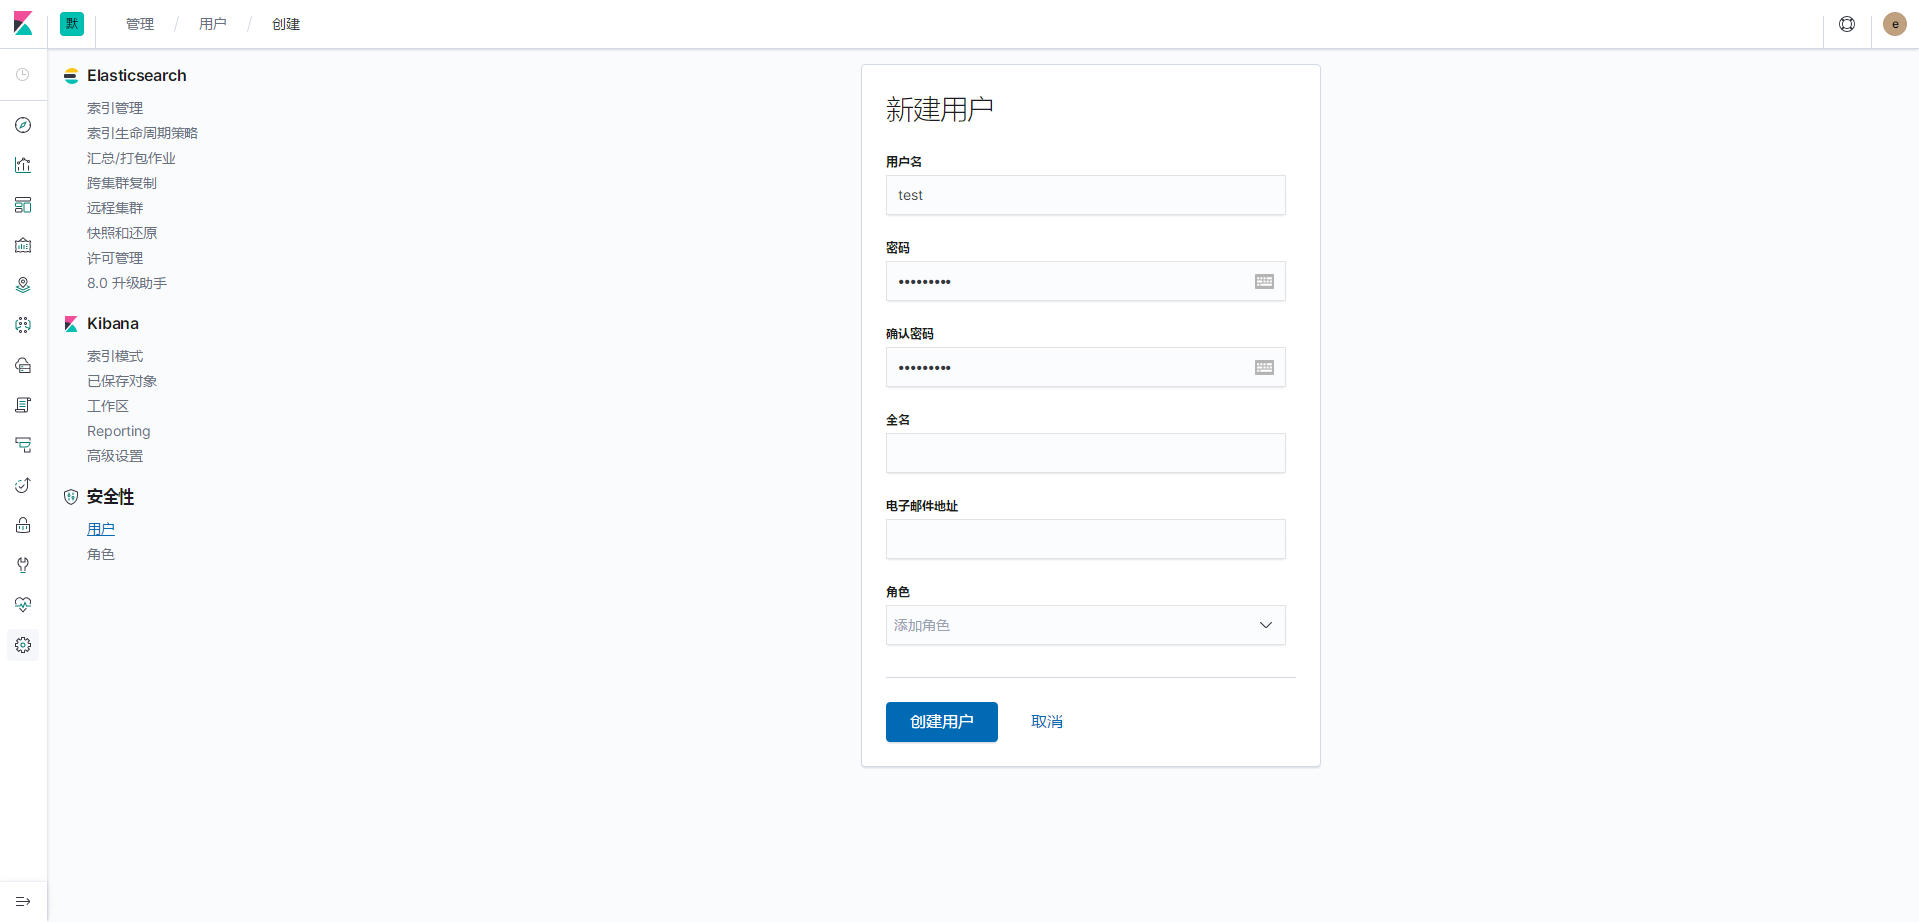
test用户
es认证权限
不指定用户
$ curl -XGET 'http://127.0.0.1:9200/megacorp/employee/1'
{"error":{"root_cause":[{"type":"security_exception","reason":"missing authentication credentials for REST request [/megacorp/employee/1]","header":{"WWW-Authenticate":"Basic realm=\"security\" charset=\"UTF-8\""}}],"type":"security_exception","reason":"missing authenti
cation credentials for REST request [/megacorp/employee/1]","header":{"WWW-Authenticate":"Basic realm=\"security\" charset=\"UTF-8\""}},"status":401}
指定使用拥有访问megac*索引权限的用户why
$ curl -XGET -u why:123456 'http://127.0.0.1:9200/megacorp/employee/1'
{"_index":"megacorp","_type":"employee","_id":"1","_version":1,"_seq_no":0,"_primary_term":1,"found":true,"_source":{"first_name" : "John", "last_name" : "Smith", "age" : 25, "about" : "I love to go rock climbing", "interests": [ "sports", "music" ]}}
指定使用没有权限的用户test
$ curl -XGET -u test:123456 'http://127.0.0.1:9200/megacorp/employee/1'
{"error":{"root_cause":[{"type":"security_exception","reason":"action [indices:data/read/get] is unauthorized for user [test]"}],"type":"security_exception","reason":"action [indices:data/read/get] is unauthorized for user [test]"},"status":403}
如果输入密码错误
$ curl -XGET -u test:1234567 'http://127.0.0.1:9200/megacorp/employee/1'
{"error":{"root_cause":[{"type":"security_exception","reason":"unable to authenticate user [test] for REST request [/megacorp/employee/1]","header":{"WWW-Authenticate":"Basic realm=\"security\" charset=\"UTF-8\""}}],"type":"security_exception","reason":"unable to authen
ticate user [test] for REST request [/megacorp/employee/1]","header":{"WWW-Authenticate":"Basic realm=\"security\" charset=\"UTF-8\""}},"status":401}
kibana的权限
为角色access_megacorp绑定默认可用区
创建两个kibana的索引模式
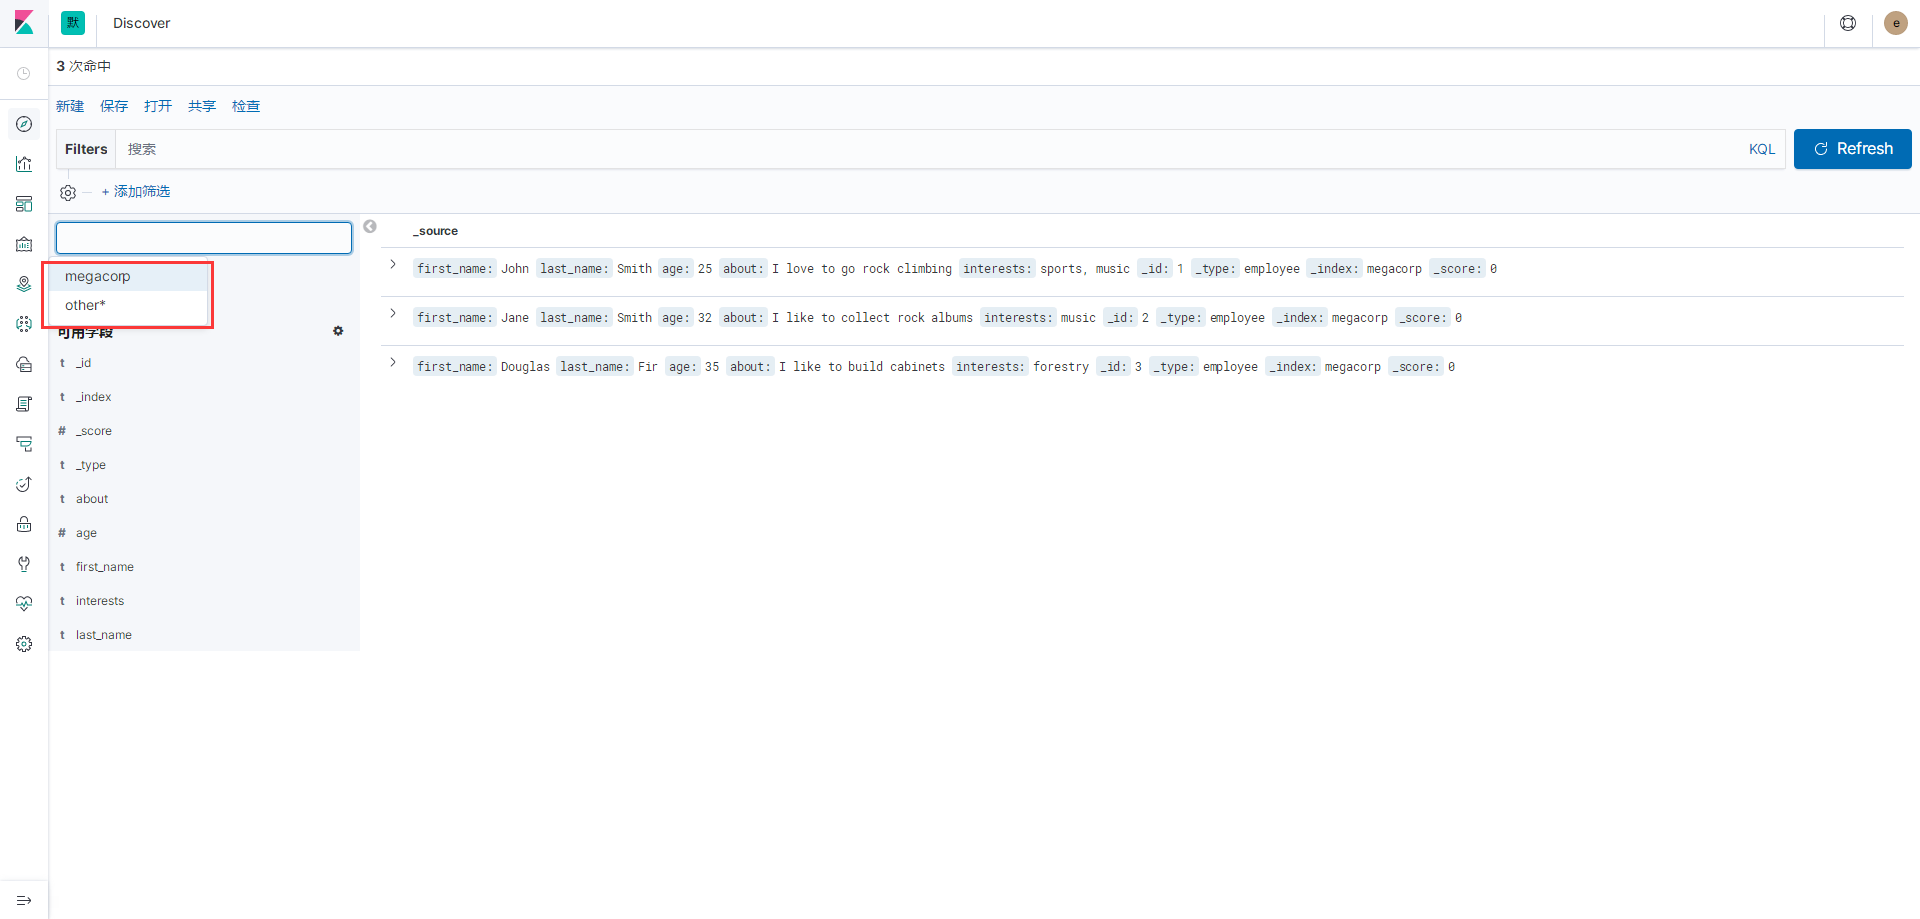
然后能在Discover看到两个索引,并且都是有数据的
然后使用why用户登录
也是能看到两个索引的,但是没有权限的索引不能访问到数据

这样对于分用户是不友好的,就需要区分工作区
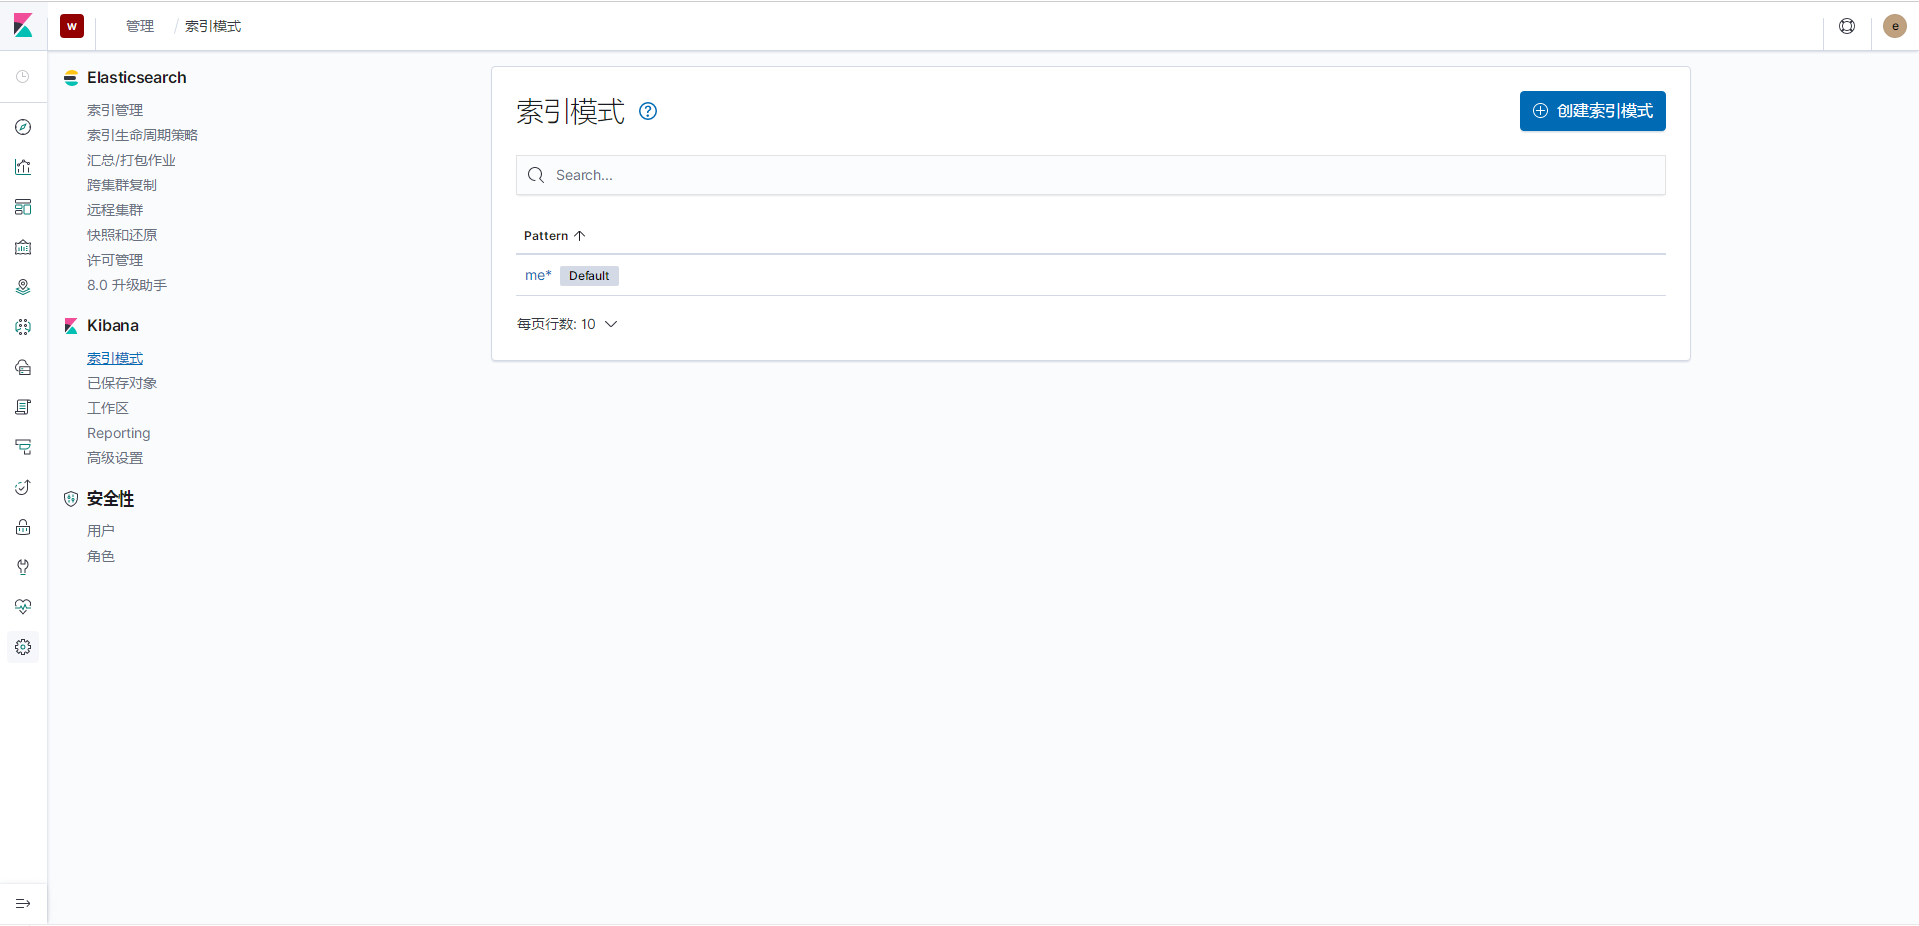
创建工作区why
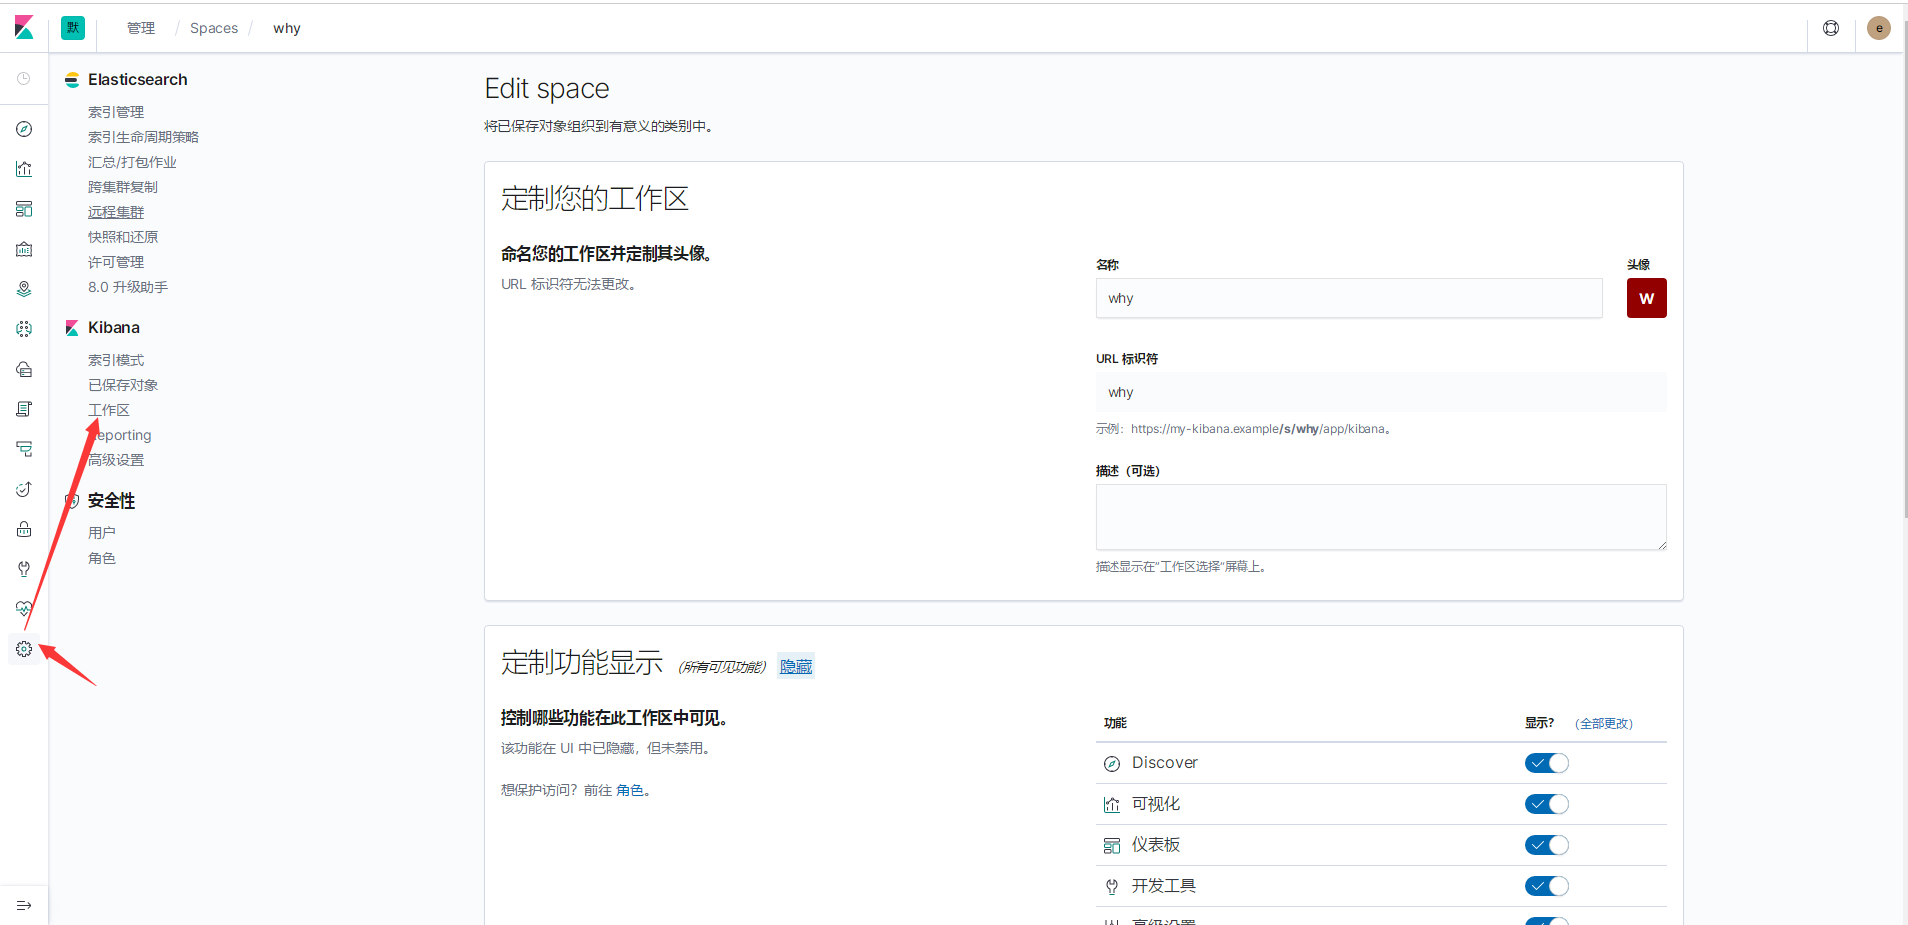
为工作区why创建索引模式
将角色access_megacorp绑定可用区why
然后使用why用户登录
可以看到只有一个索引


