prometheus
目录:
安装
通过二进制方式安装,可以参考官方文档——getting_started
$ wget https://github.com/prometheus/prometheus/releases/download/v2.7.1/prometheus-2.7.1.linux-amd64.tar.gz
$ tar xf prometheus-2.7.1.linux-amd64.tar.gz
$ cd prometheus-2.7.1.linux-amd64/
$ ./prometheus --help
需要列举一些需要注意的参数
--config.file="prometheus.yml"  # 默认配置文件
--web.listen-address="0.0.0.0:9090" # 默认监听端口
--web.max-connections=512 # 最大连接数
--storage.tsdb.path="data/" # tsdb存储路径
--storage.tsdb.retention=15d # 存储时间15天
启动服务
$ ./prometheus --config.file="prometheus.yml"
可以直接访问对应IP的9090端口,进行web操作
- Alerts 管理告警
- Graph 可以写一些promQL来查询数据
- Status.Running&Build Informer 查看基础环境信息
- Status.Command-Line Flags 命令行参数
- Configuration 配置文件
- Rules 角色,监控指标的告警规则
- Targets 已纳入监控的主机
- Service Discovery 相关动态发现被监控目标
配置服务
$ vi /usr/lib/systemd/system/prometheus.service
[Unit]
Description=Prometheus
Documentation=https://prometheus.io/docs/

[Service]
Restart=on-failure
ExecStart=/root/prometheus-2.7.1.linux-amd64/prometheus --config.file=/root/prometheus-2.7.1.linux-amd64/prometheus.yml

[Install]
WantedBy=multi-user.target
$ systemctl daemon-reload
$ systemctl restart prometheus.service
$ systemctl status prometheus.service
docker安装依然参考官方文档
$ docker run -d -p 9090:9090 -v /root/prometheus-2.7.1.linux-amd64/prometheus.yml:/etc/prometheus/prometheus.yml prom/prometheus
配置
全局配置文件
参考官方配置文档
global:
  # How frequently to scrape targets by default.
  [ scrape_interval: <duration> | default = 1m ]
  # How long until a scrape request times out.
  [ scrape_timeout: <duration> | default = 10s ]
  # How frequently to evaluate rules.
  [ evaluation_interval: <duration> | default = 1m ]
  # The labels to add to any time series or alerts when communicating with
  # external systems (federation, remote storage, Alertmanager).
  external_labels:
    [ <labelname>: <labelvalue> ... ]
# Rule files specifies a list of globs. Rules and alerts are read from
# all matching files.
rule_files:
  [ - <filepath_glob> ... ]
# A list of scrape configurations.
scrape_configs:
  [ - <scrape_config> ... ]
# Alerting specifies settings related to the Alertmanager.
alerting:
  alert_relabel_configs:
    [ - <relabel_config> ... ]
  alertmanagers:
    [ - <alertmanager_config> ... ]
# Settings related to the remote write feature.
remote_write:
  [ - <remote_write> ... ]
# Settings related to the remote read feature.
remote_read:
  [ - <remote_read> ... ]
- scrape_interval 采集频率 1m
- scrape_timeout 超时时间 10s
- evaluation_interval 告警周期
- external_labels 外部标签
- rule_files 告警规则配置
- scrape_configs 被监控端配置
- alerting 报警相关配置
- remote_write 写入第三方数据库
- remote_read 读取第三方数据库
可以在web的graph标签下搜索一个,例如process_cpu_seconds_total

可以看到对应监控项和标签
process_cpu_seconds_total{instance="localhost:9090",job="prometheus"}
可以通过静态配置的方式添加标签
    static_configs:
    - targets: ['localhost:9090']
      labels:
        qcloud: bj3
检查配置文件
$ ./promtool check config ./prometheus.yml
Checking ./prometheus.yml
  SUCCESS: 0 rule files found
$ kill -hup <pid>
再查询一下就能看到新加的标签了
process_cpu_seconds_total{instance="localhost:9090",job="prometheus",qcloud="bj3"}
在configuration中也可以看到
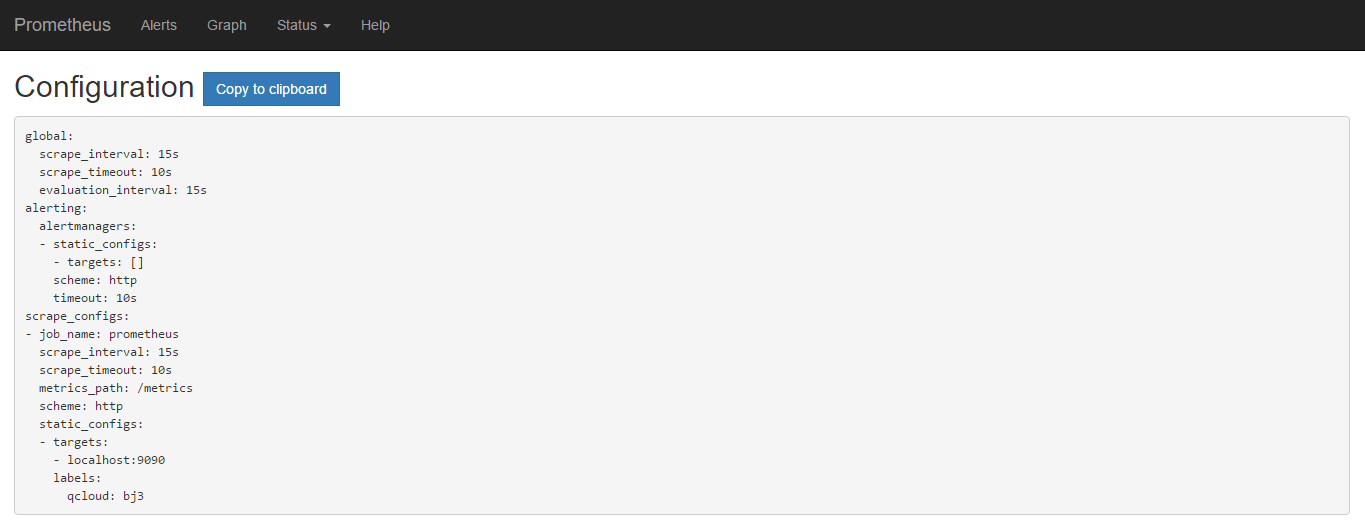
如果聚合查询可以使用sum(process_cpu_seconds_total{qcloud='bj3'})
scrape_configs
job_name: <job_name>

[ scrape_interval: <duration> | default = <global_config.scrape_interval> ]
[ scrape_timeout: <duration> | default = <global_config.scrape_timeout> ]
[ metrics_path: <path> | default = /metrics ]
[ honor_labels: <boolean> | default = false ]

[ scheme: <scheme> | default = http ]
params:
  [ <string>: [<string>, ...] ]
basic_auth:
  [ username: <string> ]
  [ password: <secret> ]
  [ password_file: <string> ]
[ bearer_token: <secret> ]
[ bearer_token_file: /path/to/bearer/token/file ]
tls_config:
  [ <tls_config> ]
[ proxy_url: <string> ]

azure_sd_configs:
  [ - <azure_sd_config> ... ]
consul_sd_configs:
  [ - <consul_sd_config> ... ]
dns_sd_configs:
  [ - <dns_sd_config> ... ]
ec2_sd_configs:
  [ - <ec2_sd_config> ... ]
openstack_sd_configs:
  [ - <openstack_sd_config> ... ]
file_sd_configs:
  [ - <file_sd_config> ... ]
gce_sd_configs:
  [ - <gce_sd_config> ... ]
kubernetes_sd_configs:
  [ - <kubernetes_sd_config> ... ]
marathon_sd_configs:
  [ - <marathon_sd_config> ... ]
nerve_sd_configs:
  [ - <nerve_sd_config> ... ]
serverset_sd_configs:
  [ - <serverset_sd_config> ... ]
triton_sd_configs:
  [ - <triton_sd_config> ... ]
static_configs:
  [ - <static_config> ... ]
relabel_configs:
  [ - <relabel_config> ... ]
metric_relabel_configs:
  [ - <relabel_config> ... ]


[ sample_limit: <int> | default = 0 ]
针对job单独配置 默认继承全局配置
- metrics 默认接口
- honor_labels 标签动作 是否覆盖label
- scheme采集方式
- params访问参数
- basic_auth 认证方式 是否需要登录 token
- tls 证书相关
- proxy_url 代理方式
file_sd_configskubernetes_sd_configs- static_config 静态发现被监控端
- relabel_config 重写标签
metric_relabel_configs采集之后重写标签- sample 样本数量
relabel_configs
指标名称和一组标签组成一个多维模型,允许在采集之前对任何目标及其标签进行修改
意义有三种
- 现有标签重命名
- 删除标签
- 过滤目标
# 源标签
[ source_labels: '[' <labelname> [, ...] ']' ]
# 多个源标签的连接符,默认是`;`
[ separator: <string> | default = ; ]
# 重新标记的标签
[ target_label: <labelname> ]
# 正则匹配源标签
[ regex: <regex> | default = (.*) ]
# Modulus to take of the hash of the source label values.
[ modulus: <uint64> ]
# 替换正则表达式匹配到的分组
[ replacement: <string> | default = $1 ]
# 基于正则匹配的动作
[ action: <relabel_action> | default = replace ]
- replace 对正则目标进行,使用replacement替换引用的表达式进行替换
- keep 删除正则不匹配的目标
- drop 删除正则匹配的目标
- hashmod
- labelmap 匹配的标签,复制标签名进行分组引用
- labelkeep 删除不匹配的标签
- labeldrop 删除匹配的标签
标签重命名
将已有的标签进行重命名
默认会采集job_name和target
添加配置
    static_configs:
    - targets: ['localhost:9090']
      labels:
        qcloud: bj3
    relabel_configs:
    - action: replace
      source_labels: ['job']
      regex: (.*)
      replacement: $1
      target_label: new_job_name
重启之后查询到的数据
process_cpu_seconds_total{instance="localhost:9090",job="prometheus",new_job_name="prometheus",qcloud="bj3"}
可以看到添加了label
    static_configs:
    - targets: ['localhost:9090']
      labels:
        qcloud: bj3
    relabel_configs:
    - action: replace
      source_labels: ['job']
      regex: (.*)
      replacement: $1
      target_label: new_job_name
    - action: drop
      source_labels: ['job']
      regex: (.*)
Targets中可以看到已经没有监控的job了
删除标签同理
    - action: drop
      regex: job
服务发现
基于文件的服务发现
  - job_name: 'prometheus'
    file_sd_configs:
      - files: ['/root/prometheus-2.7.1.linux-amd64/sd_config/*.yml']
        refresh_interval: 5s
- 通配
- 刷新间隔
sd_config/file.yml
- targets:
  - localhost: 9000
    labels: prometheus_file
target端也可以看到相关的东西

监控案例
在下载页面也能找到各种各样的exporter,可以理解为agent
参考官方文档
$ wget https://github.com/prometheus/node_exporter/releases/download/v0.17.0/node_exporter-0.17.0.linux-amd64.tar.gz
$ tar xf node_exporter-0.17.0.linux-amd64.tar.gz
$ cd node_exporter-0.17.0.linux-amd64/
参数可以通过./node_exporter --help指定那些不进行收集,可以指定监控那些Service,会监听一个9100的端口,默认暴露接口是metrics
/usr/lib/systemd/system/node_exporter.service
[Unit]
Description=Prometheus
Documentation=https://prometheus.io/docs/

[Service]
Restart=on-failure
ExecStart=/root/node_exporter-0.17.0.linux-amd64/node_exporter

[Install]
WantedBy=multi-user.target
然后启动服务
$ systemctl daemon-reload
$ systemctl restart node_exporter.service
创建job指定node
scrape_configs:
  # The job name is added as a label `job=<job_name>` to any timeseries scraped from this config.
  - job_name: 'prometheus'
    file_sd_configs:
      - files: ['/root/prometheus-2.7.1.linux-amd64/sd_config/*.yml']
        refresh_interval: 5s
  - job_name: 'node'
    static_configs:
    - targets:
      - 172.19.0.70:9100
重启之后也可以在target端看到相关的node
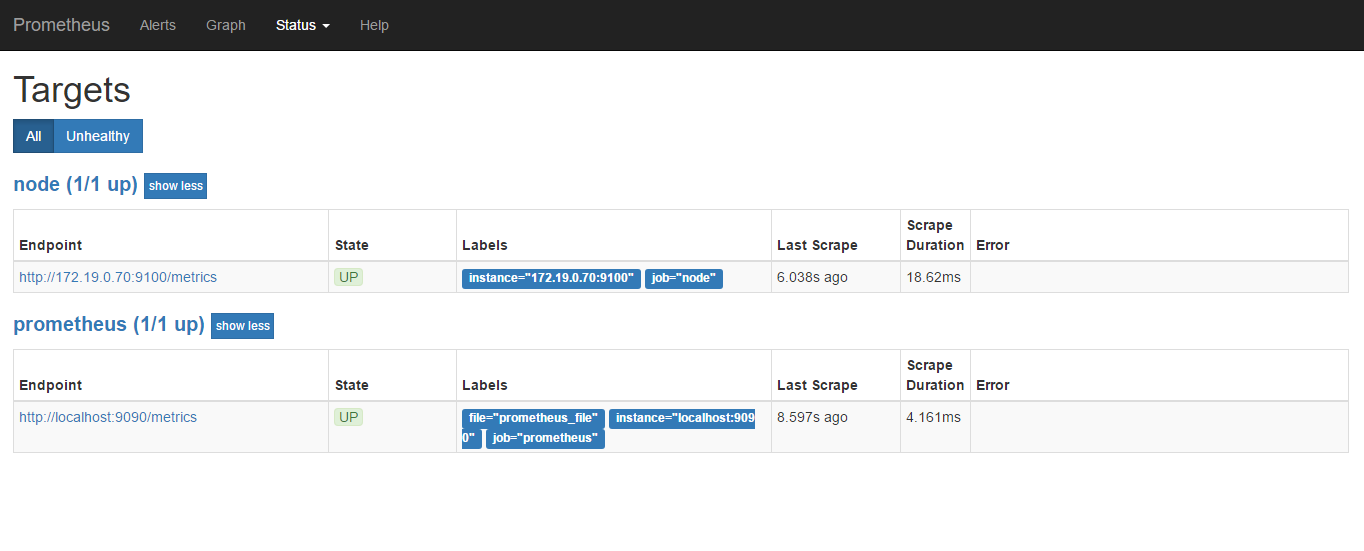
可以查看一下node的CPUnode_cpu_seconds_total
PromSQL
支持加减乘除
CPU使用率
100-(avg(irate(node_cpu_seconds_total{mode="idle"}[5m]))by(instance)*100)
内存使用率
100-(node_memory_MemFree_bytes+node_memory_Cached_bytes+node_memory_Buffers_bytes)/node_memory_MemTotal_bytes*100
磁盘使用率
node_filesystem_free_bytes{mountpoint="/",fstype=~"ext4|xfs"} / node_filesystem_size_bytes{mountpoint="/",fstype=~"ext4|xfs"} *100
监控服务状态
修改/usr/lib/systemd/system/node_exporter.servic文件然后重启服务
[Unit]
Description=Prometheus
Documentation=https://prometheus.io/docs/

[Service]
Restart=on-failure
ExecStart=/root/node_exporter-0.17.0.linux-amd64/node_exporter --collector.systemd --collector.systemd.unit-whitelist=(docker|sshd|kubelet).service

[Install]
WantedBy=multi-user.target
查询可以使用
node_systemd_unit_state{name="docker.service",state="active"}
获取docker服务的状态
可视化
grafana
grafana是一个开源的度量分析和可视化系统
$ wget https://dl.grafana.com/oss/release/grafana-5.4.3-1.x86_64.rpm
$ sudo yum localinstall grafana-5.4.3-1.x86_64.rpm
也可以通过docker的方式
$ docker run -d --name=grafana -p 3000:3000 grafana/grafana
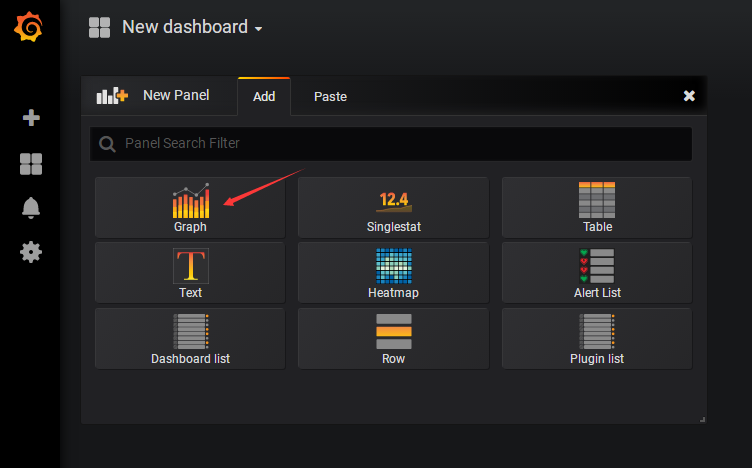
创建dashboard,示例创建一个趋势图
编辑promSQL
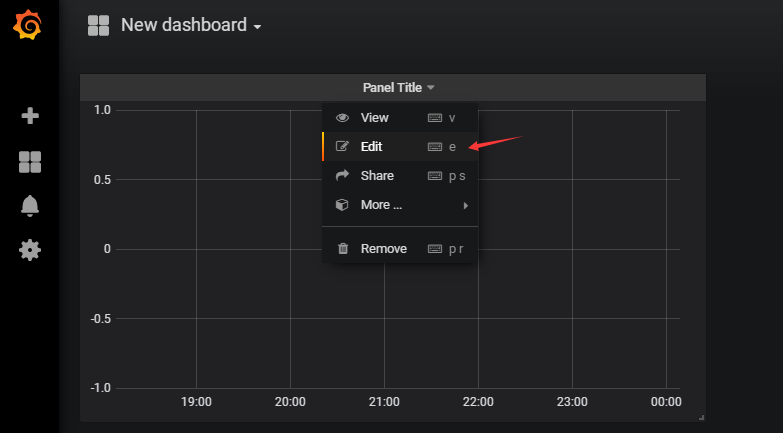
填入刚才的promSQL,例如CPU的

General可以设置监控项名称
可以再添加其他的

模板可以在https://grafana.com/dashboards上找,示例可以使用9276模板监控主机,注意数据源要匹配才行
cAdvisor
对于监控容器相关信息需要使用cAdvisor
安装参考github
$ sudo docker run \
  --volume=/:/rootfs:ro \
  --volume=/var/run:/var/run:ro \
  --volume=/sys:/sys:ro \
  --volume=/var/lib/docker/:/var/lib/docker:ro \
  --volume=/dev/disk/:/dev/disk:ro \
  --publish=8080:8080 \
  --detach=true \
  --name=cadvisor \
  google/cadvisor:latest
启动了可以直接访问8080端口的/metrics看一下获取的数据
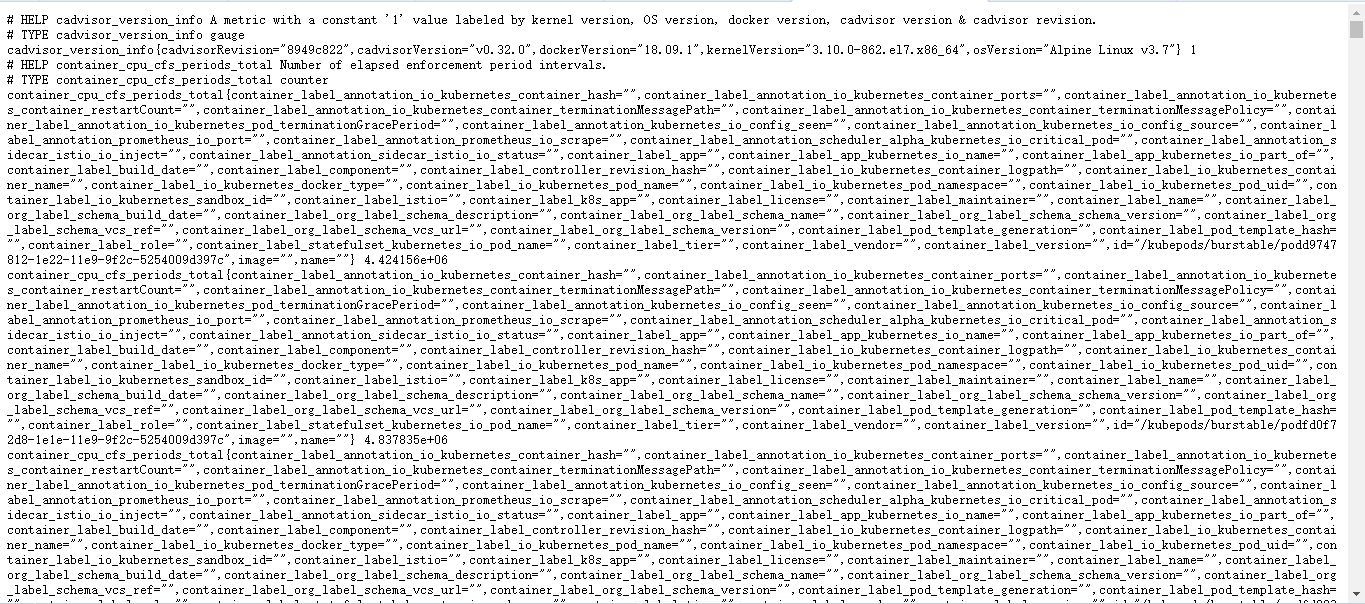
在prometheus的配置中配置cadvisor
  - job_name: 'docker'
    static_configs:
    - targets: ['172.19.0.70:8080']
重启服务
$ ./promtool check config prometheus.yml
$ systemctl restart prometheus
在web的target中可以看到刚在的docker的job,可以搜一下container_cpu_load_average_10s相关指标
导入193模板可以进行展示
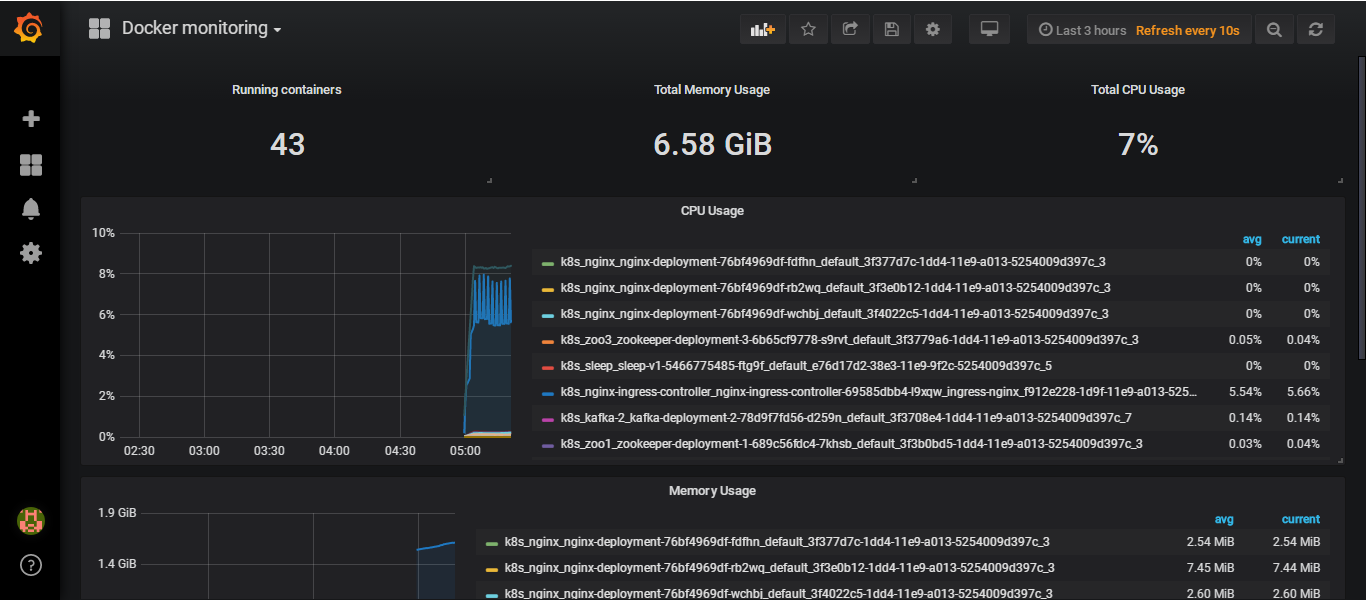
mysqld_exporter
mysqld_exporter使用参考github地址
先安装和配置mysql
$ yum install -y mariadb-server mariadb
$ systemctl start mariadb
$ mysql
Welcome to the MariaDB monitor.  Commands end with ; or \g.
Your MariaDB connection id is 2
Server version: 5.5.60-MariaDB MariaDB Server

Copyright (c) 2000, 2018, Oracle, MariaDB Corporation Ab and others.

Type 'help;' or '\h' for help. Type '\c' to clear the current input statement.

MariaDB [(none)]> CREATE USER 'why'@'localhost' IDENTIFIED BY '123456';
Query OK, 0 rows affected (0.00 sec)

MariaDB [(none)]> GRANT PROCESS, REPLICATION CLIENT, SELECT ON *.* TO 'why'@'localhost';
Query OK, 0 rows affected (0.00 sec)
安装和配置mysqld_exporter
$ wget https://github.com/prometheus/mysqld_exporter/releases/download/v0.11.0/mysqld_exporter-0.11.0.linux-amd64.tar.gz
$ tar xf mysqld_exporter-0.11.0.linux-amd64.tar.gz
$ cd mysqld_exporter-0.11.0.linux-amd64/
$ cat << EOF > .my.cnf
[client]
user=why
password=123456
EOF
$ ./mysqld_exporter --config.my-cnf=.my.cnf
INFO[0000] Starting mysqld_exporter (version=0.11.0, branch=HEAD, revision=5d7179615695a61ecc3b5bf90a2a7c76a9592cdd)  source="mysqld_exporter.go:206"
INFO[0000] Build context (go=go1.10.3, user=root@3d3ff666b0e4, date=20180629-15:00:35)  source="mysqld_exporter.go:207"
INFO[0000] Enabled scrapers:                             source="mysqld_exporter.go:218"
INFO[0000]  --collect.slave_status                       source="mysqld_exporter.go:222"
INFO[0000]  --collect.info_schema.tables                 source="mysqld_exporter.go:222"
INFO[0000]  --collect.global_status                      source="mysqld_exporter.go:222"
INFO[0000]  --collect.global_variables                   source="mysqld_exporter.go:222"
INFO[0000] Listening on :9104                            source="mysqld_exporter.go:232"
可以看到监听的9104端口
然后步骤就和上边一样了,这边可以使用的模板有7362
告警
Alertmanager
Alertmanager是一个单独的组件,由prometheus通过push的方式发送给它
也就是说监控规则要在prometheus配置,在触发阈值后会push给Alertmanager,然后由Alertmanager来进行如何报警
安装Alertmanager
$ wget https://github.com/prometheus/alertmanager/releases/download/v0.16.1/alertmanager-0.16.1.linux-amd64.tar.gz
$ tar xf alertmanager-0.16.1.linux-amd64.tar.gz
$ cd alertmanager-0.16.1.linux-amd64/
$ ll
total 38948
-rwxr-xr-x 1 3434 3434 23072652 Jan 31 23:06 alertmanager
-rw-r--r-- 1 3434 3434      380 Jan 31 23:31 alertmanager.yml
-rwxr-xr-x 1 3434 3434 16789355 Jan 31 23:06 amtool
-rw-r--r-- 1 3434 3434    11357 Jan 31 23:31 LICENSE
-rw-r--r-- 1 3434 3434      457 Jan 31 23:31 NOTICE
alertmanager.yml
global: # 全局参数
  resolve_timeout: 5m   # 解析超时时间

route:  # 将告警怎么分配和发送
  group_by: ['alertname']   # 采用哪个标签作为分组的依据
  group_wait: 10s   # 分组等待时间10s,分组不是立刻进行发送,而是等待
  group_interval: 10s   # 发送告警的间隔时间
  repeat_interval: 1h   # 重复报警发送间隔
  receiver: 'web.hook'
receivers:  # 告警发送给谁
- name: 'web.hook'
  webhook_configs:
  - url: 'http://127.0.0.1:5001/'
inhibit_rules:  # 用于告警收敛
  - source_match:
      severity: 'critical'
    target_match:
      severity: 'warning'
    equal: ['alertname', 'dev', 'instance']
这边我的配置
global:
  resolve_timeout: 5m
  smtp_smarthost: 'smtp.163.com:25'
  smtp_from: '13552493019@163.com'
  smtp_auth_username: '13552493019@163.com'
  smtp_auth_password: '123456'
  smtp_require_tls: false


route:
  group_by: ['alertname']
  group_wait: 10s
  group_interval: 10s
  repeat_interval: 1h
  receiver: 'mail'
receivers:
- name: 'mail'
  email_configs:
  - to: '93216193@qq.com'
检查配置文件并启动服务
$ ./amtool check-config alertmanager.yml
Checking 'alertmanager.yml'  SUCCESS
Found:
 - global config
 - route
 - 0 inhibit rules
 - 1 receivers
 - 0 templates

$ ./alertmanager --config.file=alertmanager.yml
level=info ts=2019-03-03T16:41:28.247358748Z caller=main.go:177 msg="Starting Alertmanager" version="(version=0.16.1, branch=HEAD, revision=571caec278be1f0dbadfdf5effd0bbea16562cfc)"
level=info ts=2019-03-03T16:41:28.24747137Z caller=main.go:178 build_context="(go=go1.11.5, user=root@3000aa3a06c5, date=20190131-15:05:40)"
level=info ts=2019-03-03T16:41:28.306814655Z caller=cluster.go:161 component=cluster msg="setting advertise address explicitly" addr=172.19.0.125 port=9094
level=info ts=2019-03-03T16:41:28.311367313Z caller=cluster.go:632 component=cluster msg="Waiting for gossip to settle..." interval=2s
level=info ts=2019-03-03T16:41:28.336518298Z caller=main.go:334 msg="Loading configuration file" file=alertmanager.yml
level=info ts=2019-03-03T16:41:28.339922396Z caller=main.go:428 msg=Listening address=:9093
然后配置prometheus
指定altermanager的ip和port以及阈值rule
# Alertmanager configuration
alerting:
  alertmanagers:
  - static_configs:
    - targets:
      - 127.0.0.1:9093
rule_files:
  - "rules/*.yml"
可以看到alertmanager可以部署在于prometheus不同的节点上,甚至还可以高可用的负载均衡一下下
rule配置可以参考alerting_rules
这边创建一下目录,使用官方文档示例的配置文件进行测试
groups:
- name: general.rules
  rules:

  # Alert for any instance that is unreachable for >5 minutes.
  - alert: InstanceDown
    expr: up == 0
    for: 1m
    labels:
      severity: error
    annotations:
      summary: "Instance {{ $labels.instance }} down"
      description: "{{ $labels.instance }} of job {{ $labels.job }} has been down for more than 5 minutes."
- for是持续时间
- labels.severity为报警级别
- annotations为相关的描述
up相关的就可以直接通过prometheus的web页面查询一下
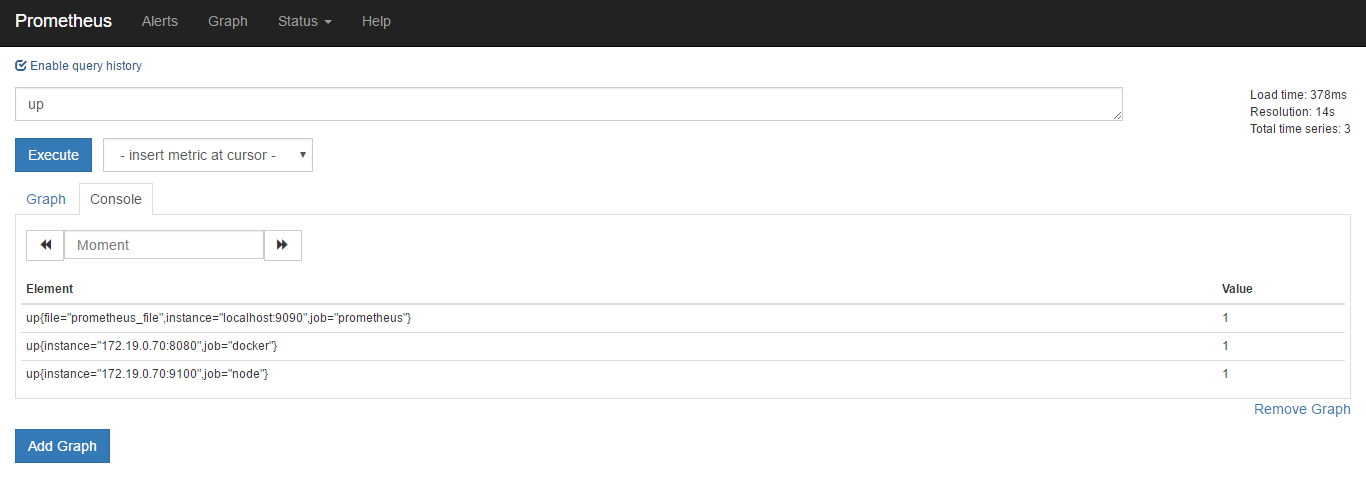
$ ./promtool check config prometheus.yml
Checking prometheus.yml
  SUCCESS: 1 rule files found

Checking rules/general.yml
  SUCCESS: 1 rules found

$ systemctl restart prometheus.service
重启服务后可以看到web页面的rule也有相关的配置文件
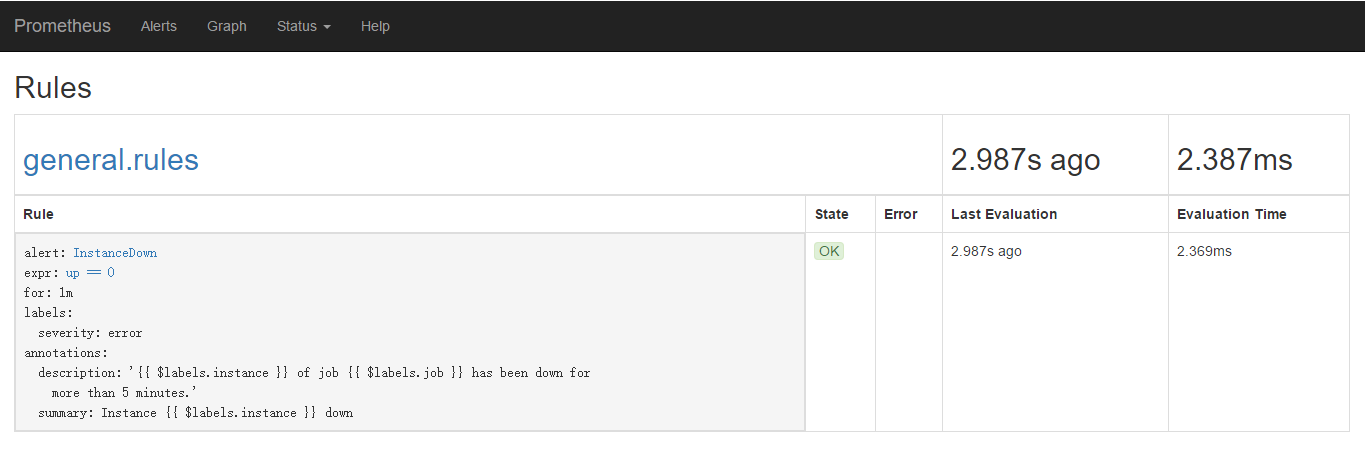
在web页面的alert也可以看到是没有alert的

可以关闭一个up的节点
$ systemctl stop node_exporter
然后再看web页面的alert有了action
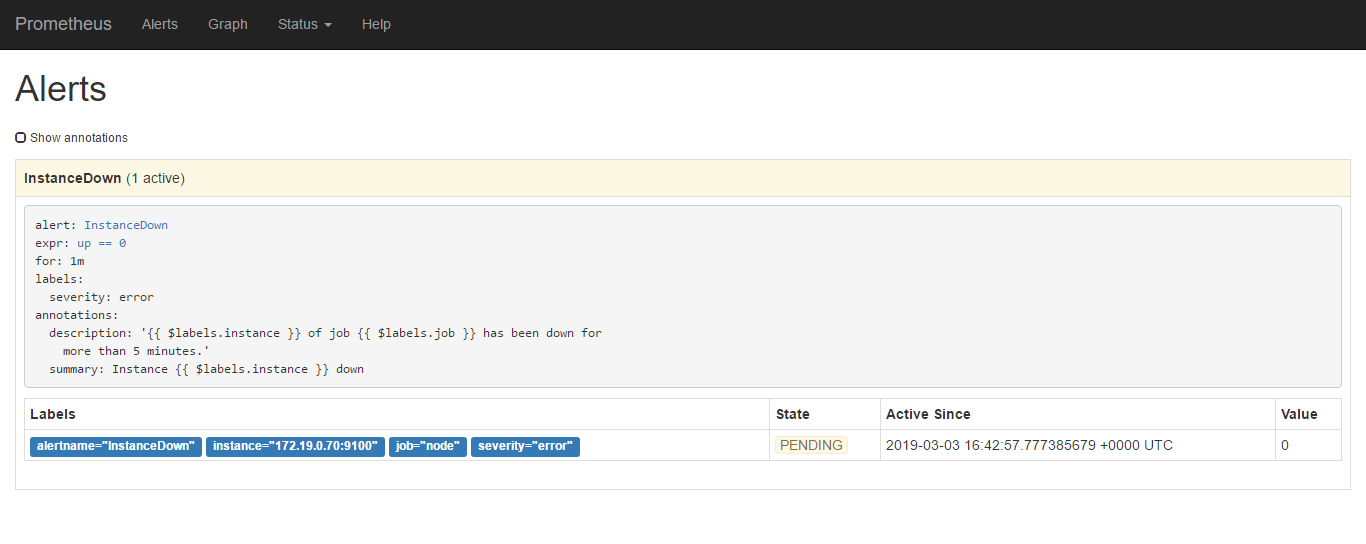
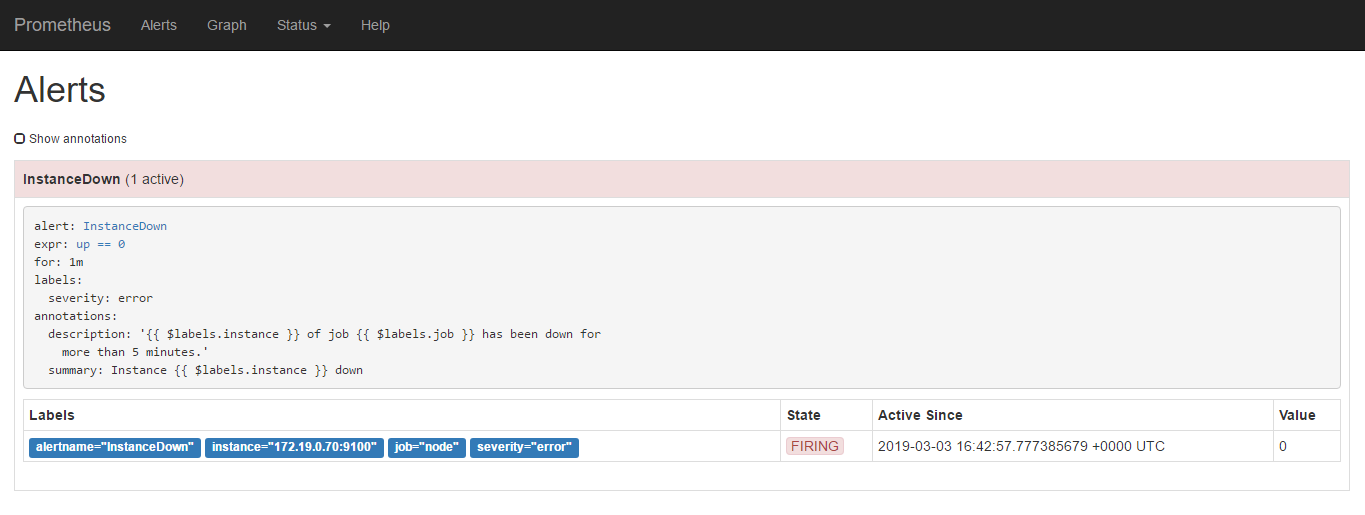
当state由Pending变为Firing则是进行了相关的发送
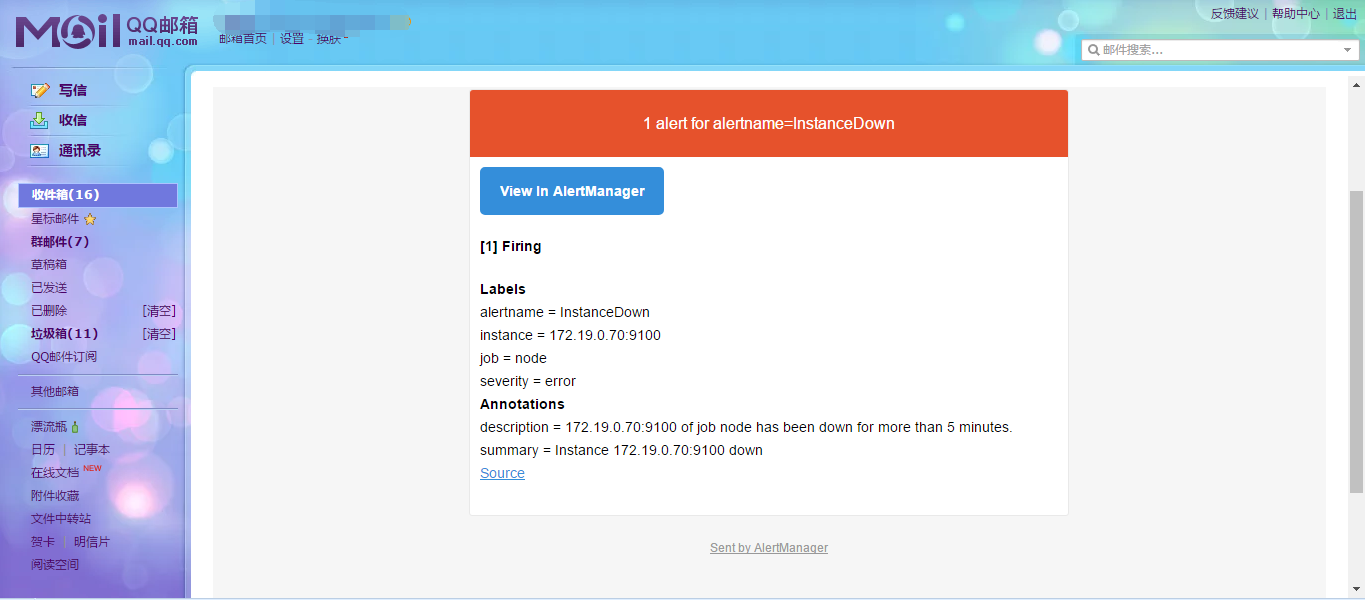
可以看到收到的邮件
对于web_hook,可以参考web_hook
告警解析
时间线
inactive 正常情况
受限配置
- 采集指标的时间 scrape_interval
- 评估告警规则的时间 evaluation_interval
pending 触发阈值没满足时间
受限配置
- 持续时间 for
firing
接收组指定
参考alerting configuration的routes相关
分组
将类似性质的报警分类为单个通知
例如十台主机同时宕机,会合并发一个报警,使用的group_by进行实现
可以减少报警邮件的数量
抑制 inhibition
当报警发出后停止重复发送由此报警引发的其他报警
inhibit_rules:  # 用于告警收敛
  - source_match:
      severity: 'critical'
    target_match:
      severity: 'warning'
    equal: ['alertname', 'dev', 'instance']
静默 silences
将在特定的时间内进行静音提示的机制
在alertmanager的9093端口进行

选new silence
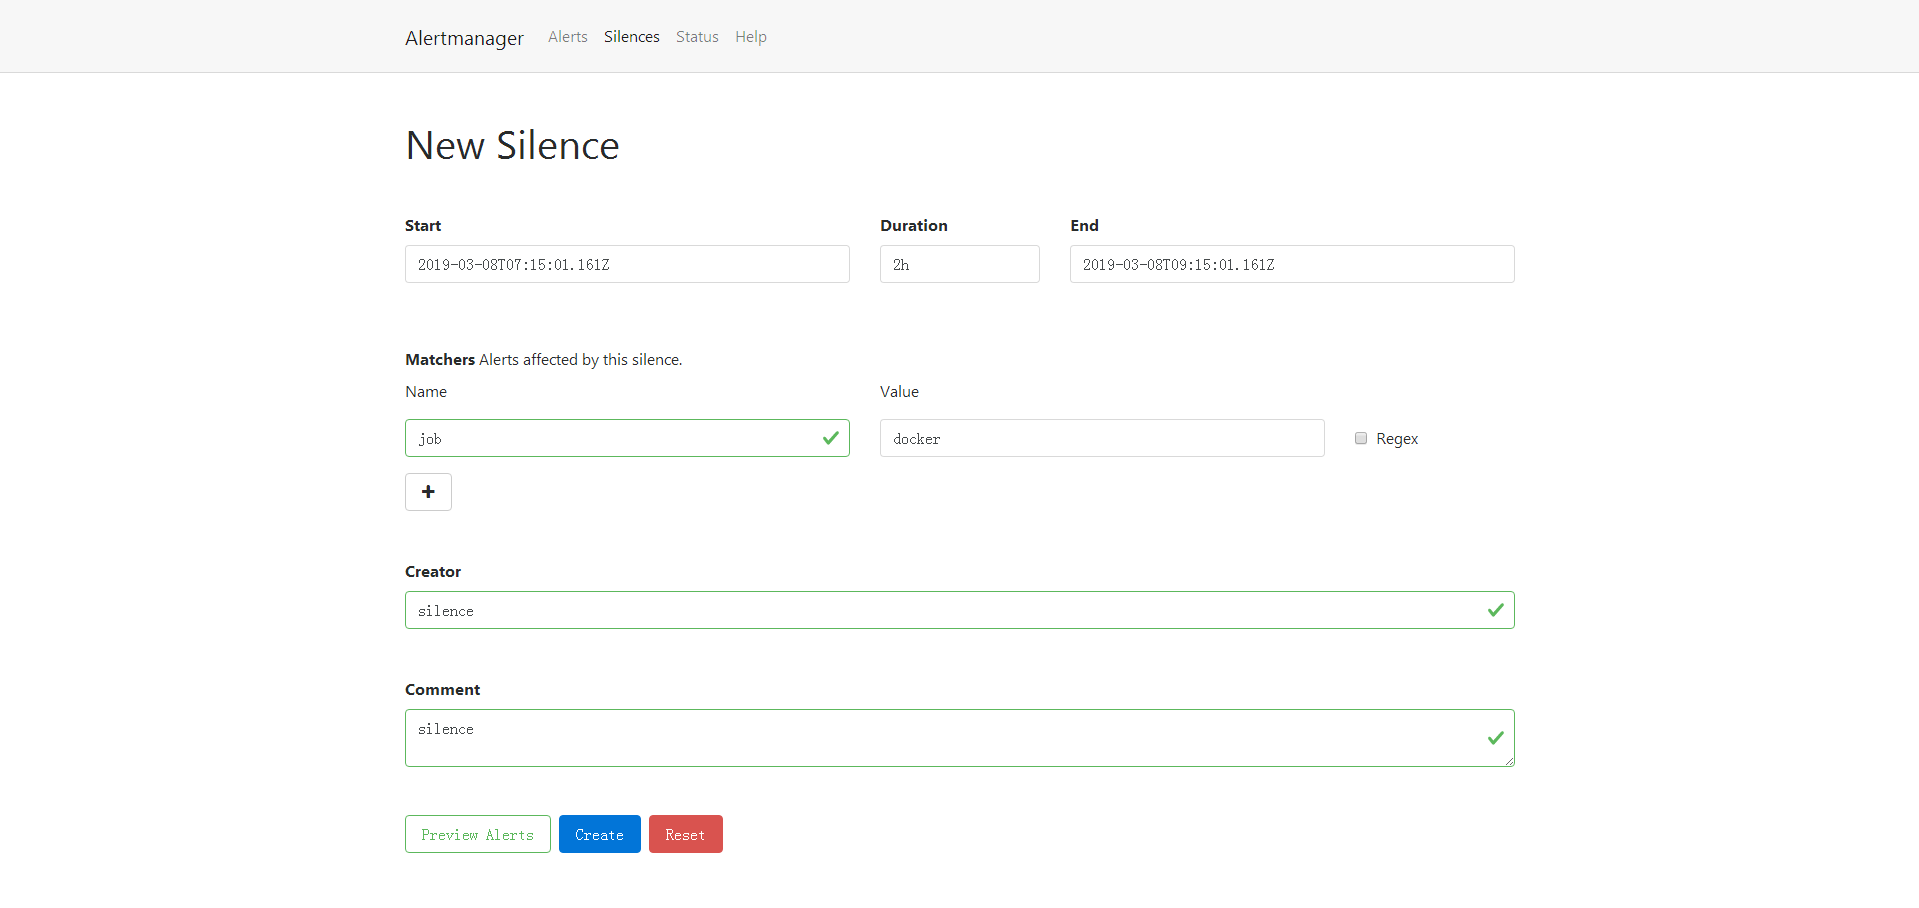
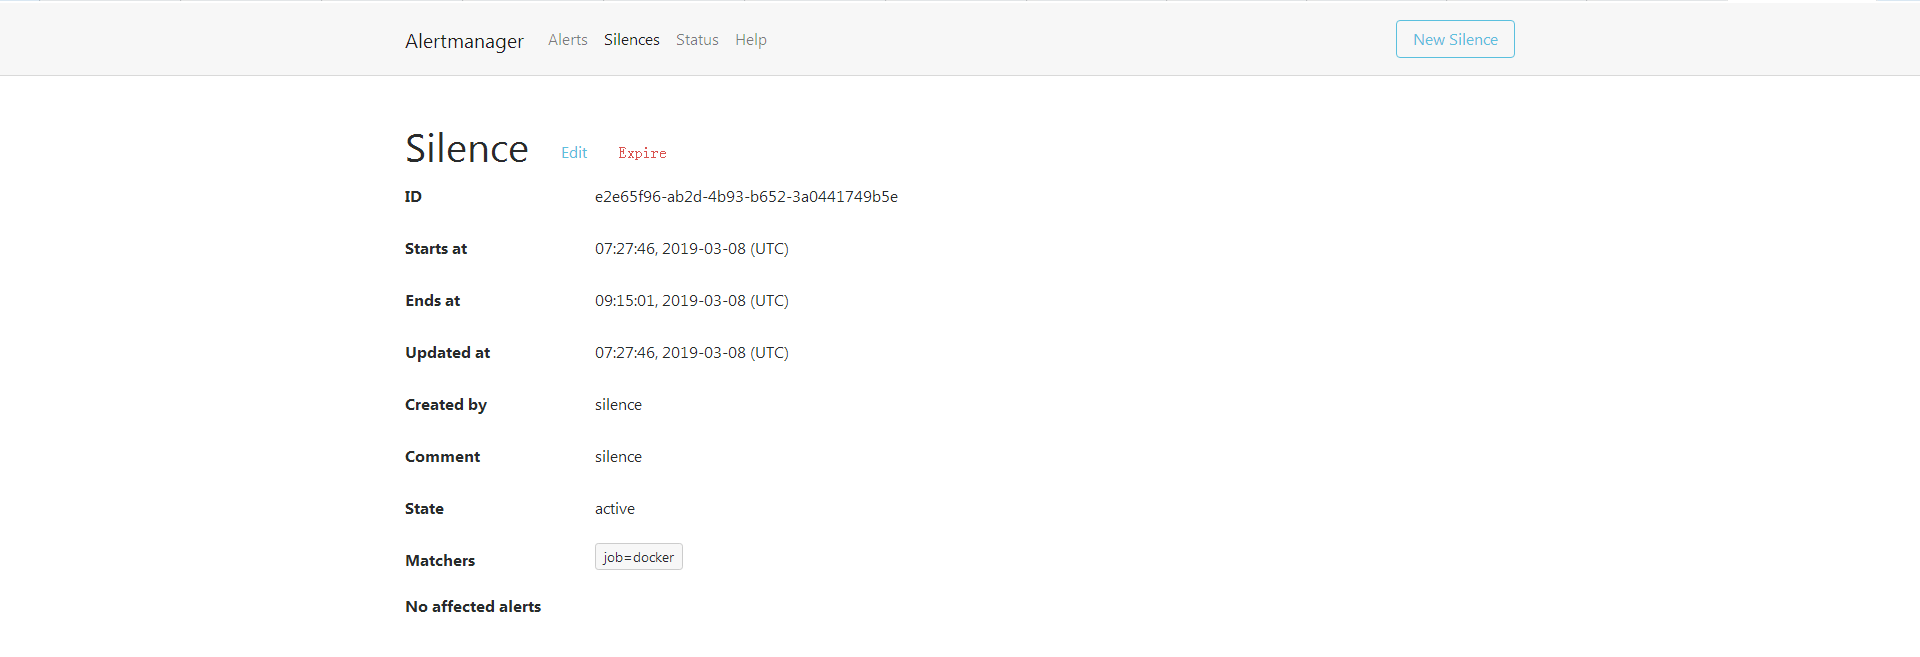
创建之后可以看到对应的silences规则
